Deshman TV repair
Now all stores and online trading platforms are filled with inexpensive LED TVs from little-known companies with unpronounceable names. Progress does not stand still, and even in such models all sorts of modern goodies are available that were previously characteristic only of the
Editor's Context
This article is an English adaptation with additional editorial framing for an international audience.
- Terminology and structure were localized for clarity.
- Examples were rewritten for practical readability.
- Technical claims were preserved with source attribution.
Source: original publication
If earlier electrolytic capacitors often broke in LCD TVs with CCFL lamps, then in modern LED-backlit TVs the most common problem is the failure of the LEDs themselves. Moreover, their service life is several times less than that of CCFL lamps. For example, the TV that came to me has a manufacturing date of 2021. Considering how long it lay in the store before it got to the owner and how long it was already in a faulty state, we can say that it worked for nothing. This is simply unacceptably small.
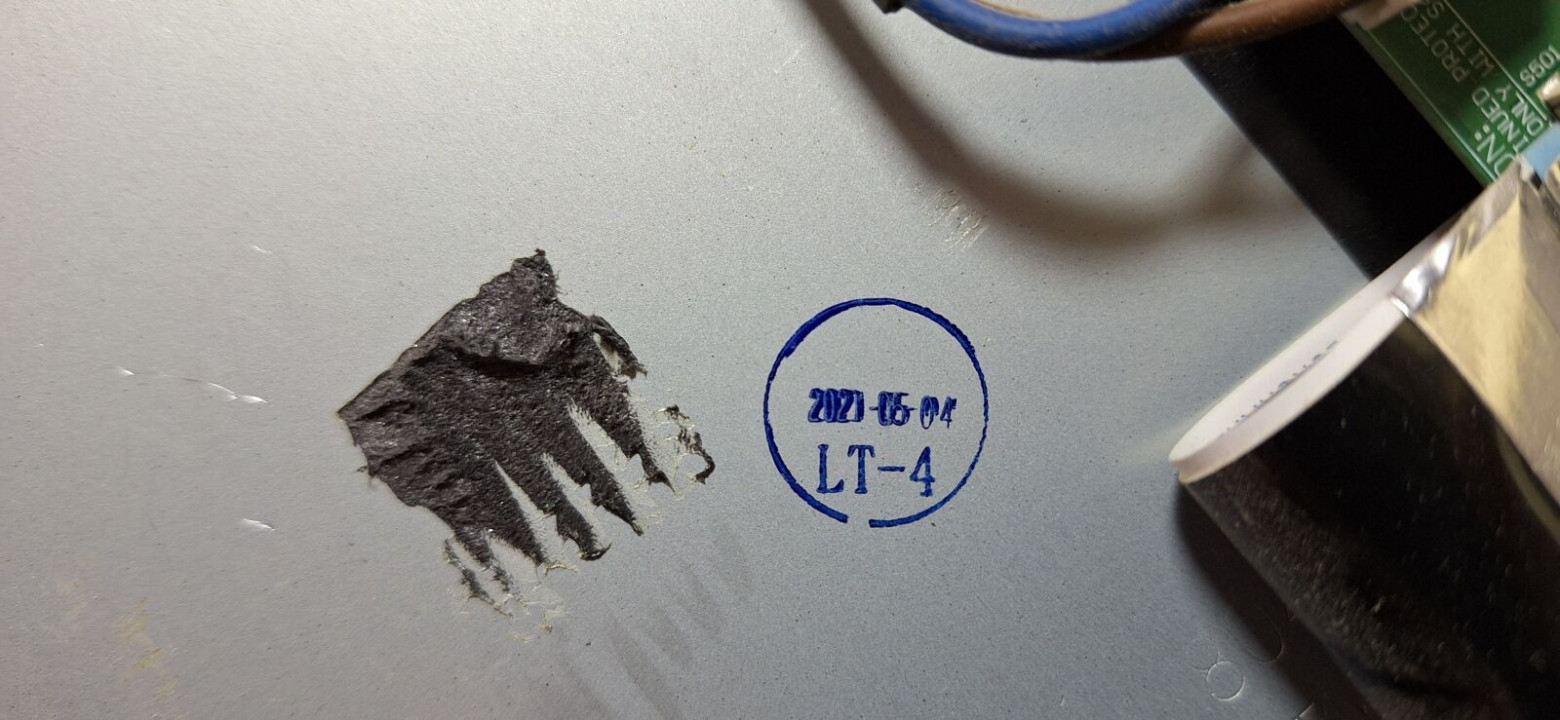
Stamp with date of manufacture
This is most often due to the heavy operating mode of LEDs. In order to save money, they operate at the maximum permissible mode and degrade very quickly. Eventually, the weakest one burns out, and since they are all usually connected in series, the entire backlight goes out. Normal repair of such a malfunction should consist of replacing all strips with LEDs with new ones.
These strips are strips of copper or aluminum with a thin layer of insulated printed conductors onto which LEDs are soldered at regular intervals. Printed conductors, together with a copper or aluminum substrate, act as a heat sink. A diffusion lens is installed above the LED. Such strips are usually supplied fully assembled, but there are also repair strips with only one LED installed. They are supposed to be used to replace only one burnt out LED.
Due to the wide variety of these strips, both in the number of installed LEDs and in their type (all of which together determine the operating voltage and current of the strip), finding original strips can be problematic. You can try to select a replacement from strips that are similar in size, voltage and current, but then you may need to replace the connector (they can be taken from faulty strips). Also, the cost of these planks is quite significant. Whole sets of such brackets for TVs of various diagonals are offered on marketplaces.
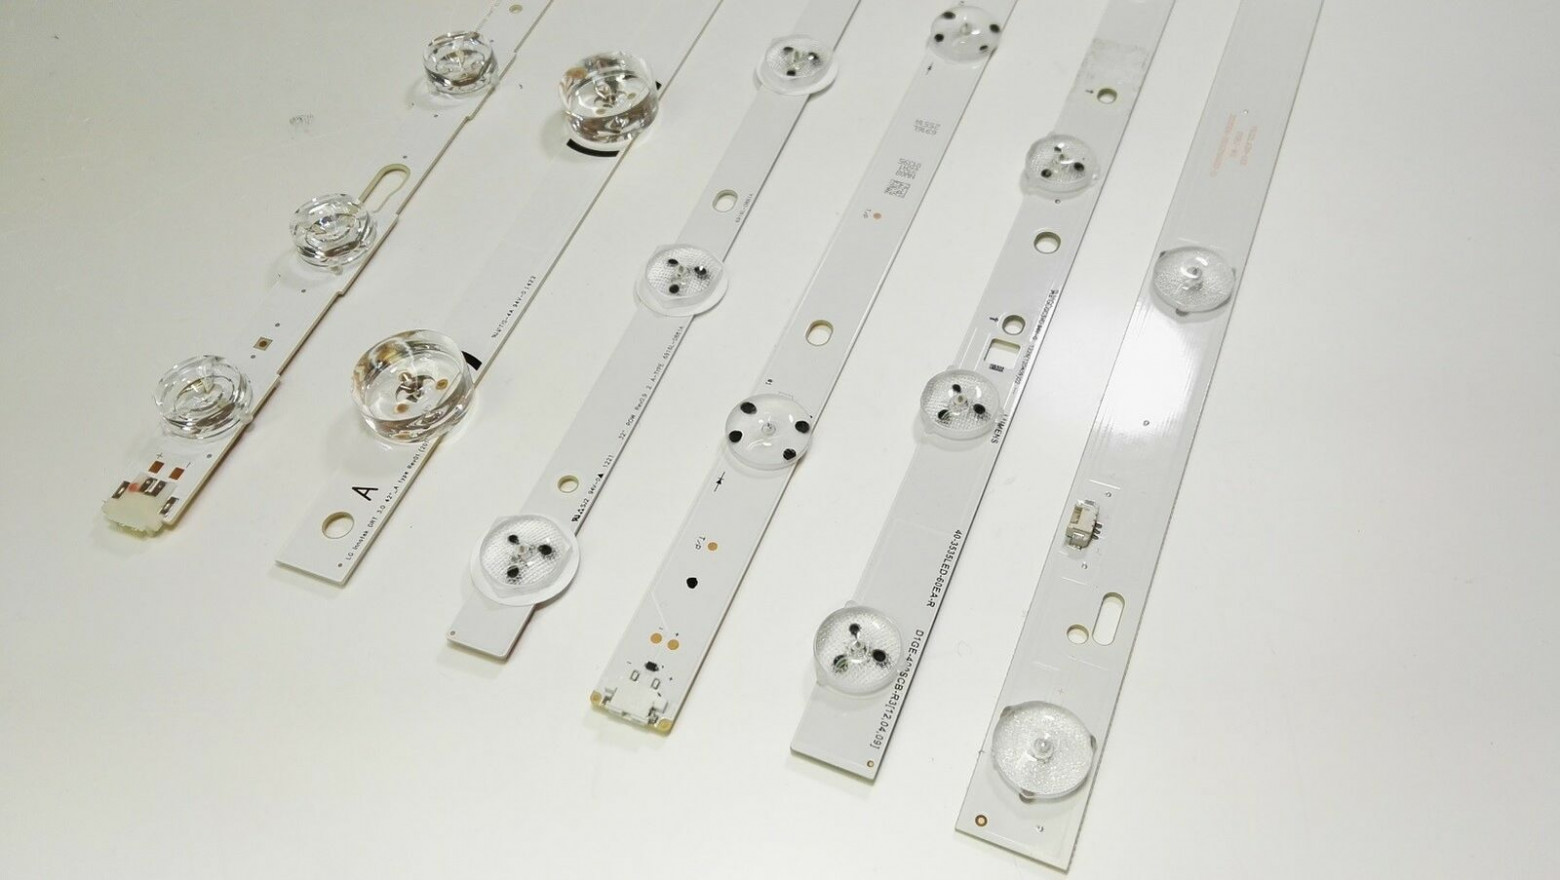
Types of LED strips (photo from the Internet)
If it is not possible to find new strips, you have to resort to replacing the LEDs. It is necessary to change all LEDs at once for two reasons. Firstly, new LEDs may differ slightly in light color and brightness from old ones. Secondly, old LEDs, even if they still shine, are still very worn out and may soon also fail. This operation is quite labor-intensive and can only be done in a workshop. The metal strip acts as a heat sink, which makes it difficult to install and dismantle components with a regular household soldering iron. It is necessary to use a special heating table. It is also necessary to have a good understanding of the huge variety of LEDs and their mounting locations (there are LEDs with the same mounting locations, but with different locations of the cathode and anode and, accordingly, the crystal). Also, after installation, it is necessary to install and fix the diffusing lenses located above each LED with sufficiently high precision. After such a repair, it also makes sense to reduce the operating current of the LEDs in order to extend their life. To do this, you need to analyze the driver circuitry and find the elements responsible for this parameter. At the same time, the brightness of the screen will decrease, worsening the consumer qualities of the device, but, according to the general opinion of repairers, this is a necessary step.
Be that as it may, the above repair operations (including the rather labor-intensive disassembly and assembly of the matrix) are quite expensive and can reach up to half the cost of a new device, depending on the greed of the technician. And even more so, the price of repairs can easily exceed the cost of this TV on the secondary market, making repairs in a workshop for devices of this class economically unfeasible. Such TVs are often sent for recycling or given to radio amateurs for spare parts.
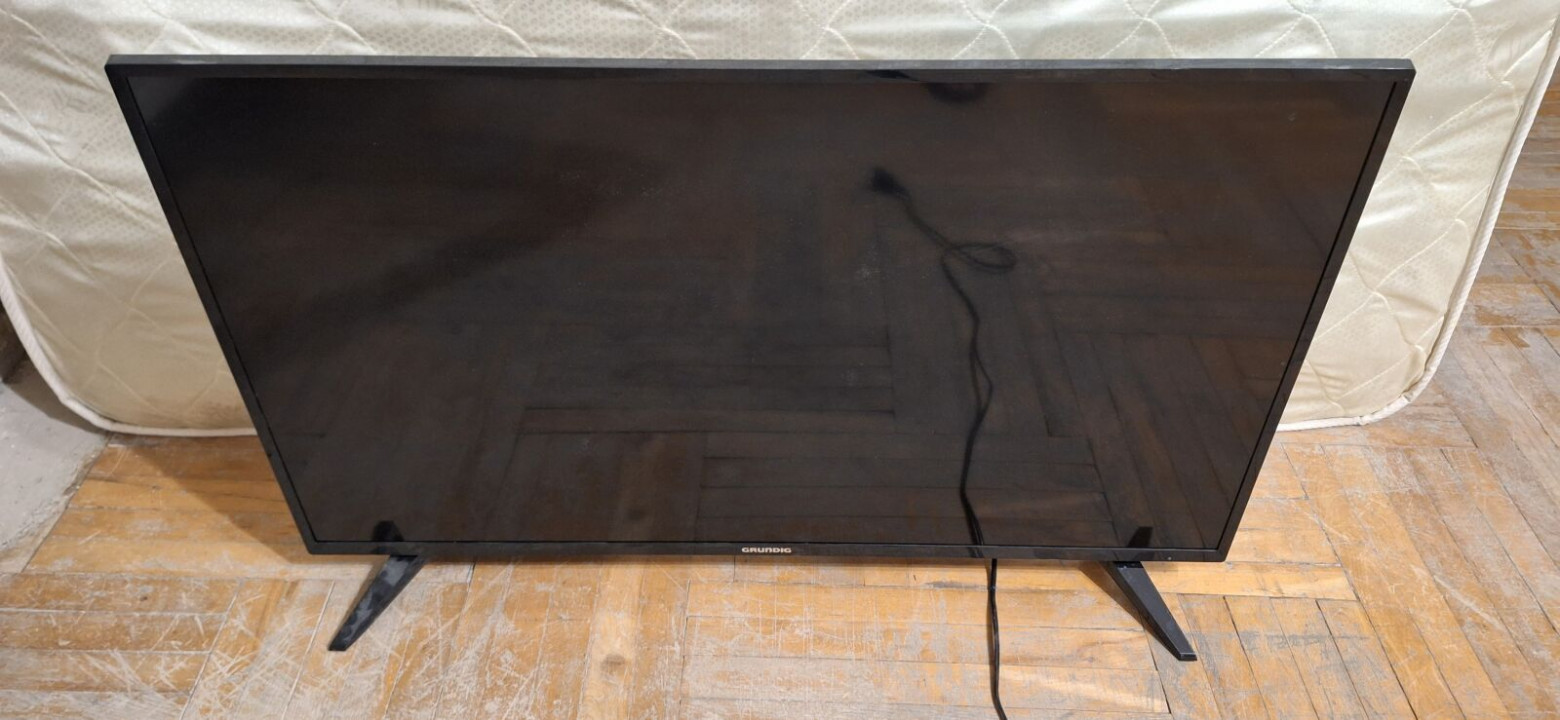
Photo against the background
That's how a similar copy came to me. Meet the Grundik TV, 40" diagonal, model 40VLE6910BP. Of course, other than the name, the device has nothing to do with the German company GRUNDIG and is completely assembled in China. Under this brand, a wide range of consumer equipment is now supplied in the very low-cost segment.
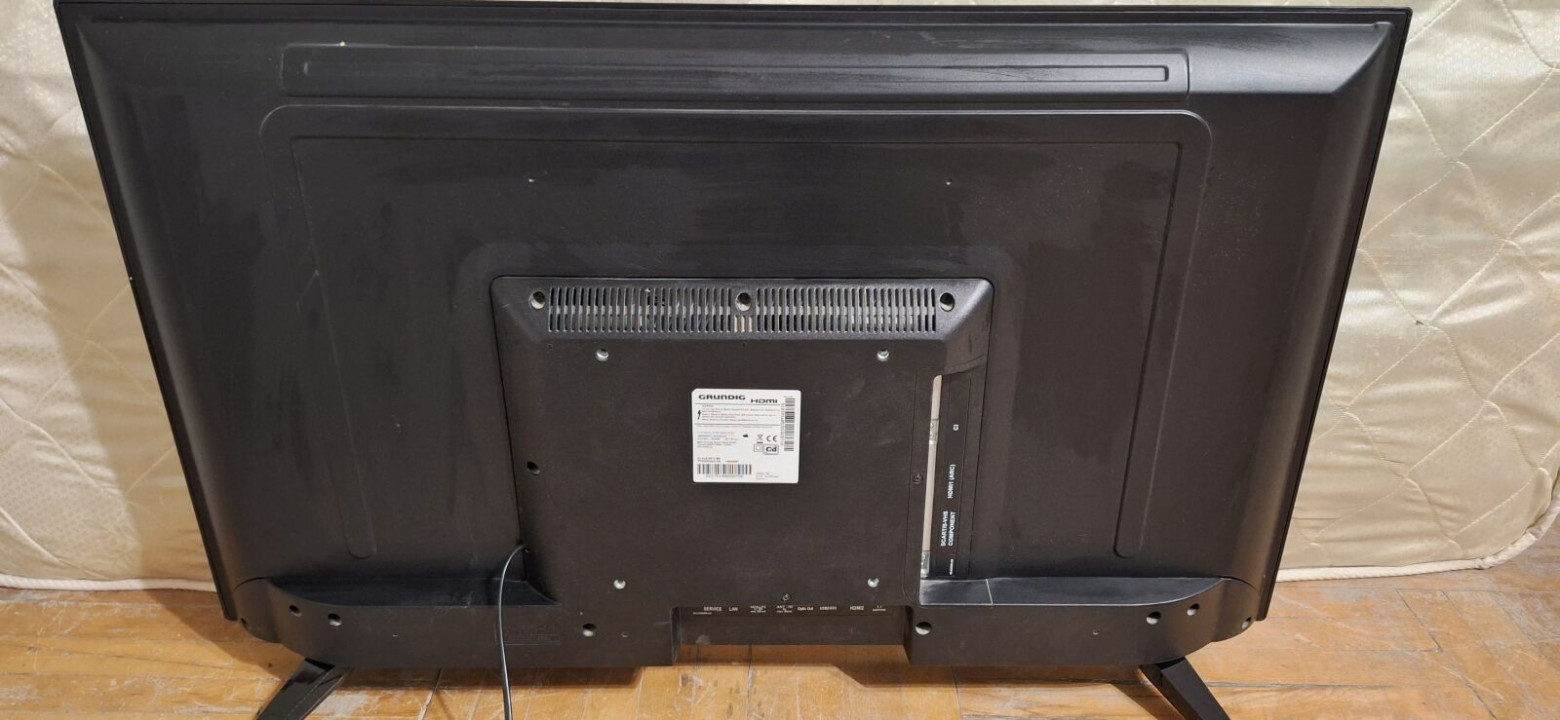
Rear view
How can such a device be brought back to life quickly and inexpensively? So without special equipment or months of waiting for parts from aliexpress. Instead of special strips, you can use an affordable and inexpensive LED strip with an adhesive layer. This tape is easy to install and easy to connect using only a regular soldering iron. The durability of such illumination will be much higher than the standard solution, because now the entire illumination power is evenly divided between several hundred individual LEDs, providing them with a comfortable thermal regime. The disadvantage of this solution is that the illumination uniformity is not very good due to the lack of diverging lenses. But, if there are no high demands on the quality of the picture and the repaired device is intended to be used in a garage or country house with a high probability of theft, then this repair option may well be possible.
By the way, there is an even cheaper and faster repair option - burnt-out LEDs can simply be short-circuited. The LED driver stabilizes the current, so if one of the diodes in the chain is missing, it will simply reduce the voltage. A darkened spot will appear on the image where the LED is turned off. However, such repairs will not help for long. Since the LEDs are already “tired”, there is a high probability that after a short time one of the remaining ones will fail and you will have to climb into the device again.
You can find a faulty LED by illuminating it from an external power source. For example, a multimeter in diode testing mode is suitable as this source. The test voltage and current of most multimeters is enough to illuminate a working LED. You can peel off the plastic part from a faulty LED and fuse a drop of solder directly onto the remaining electrodes.
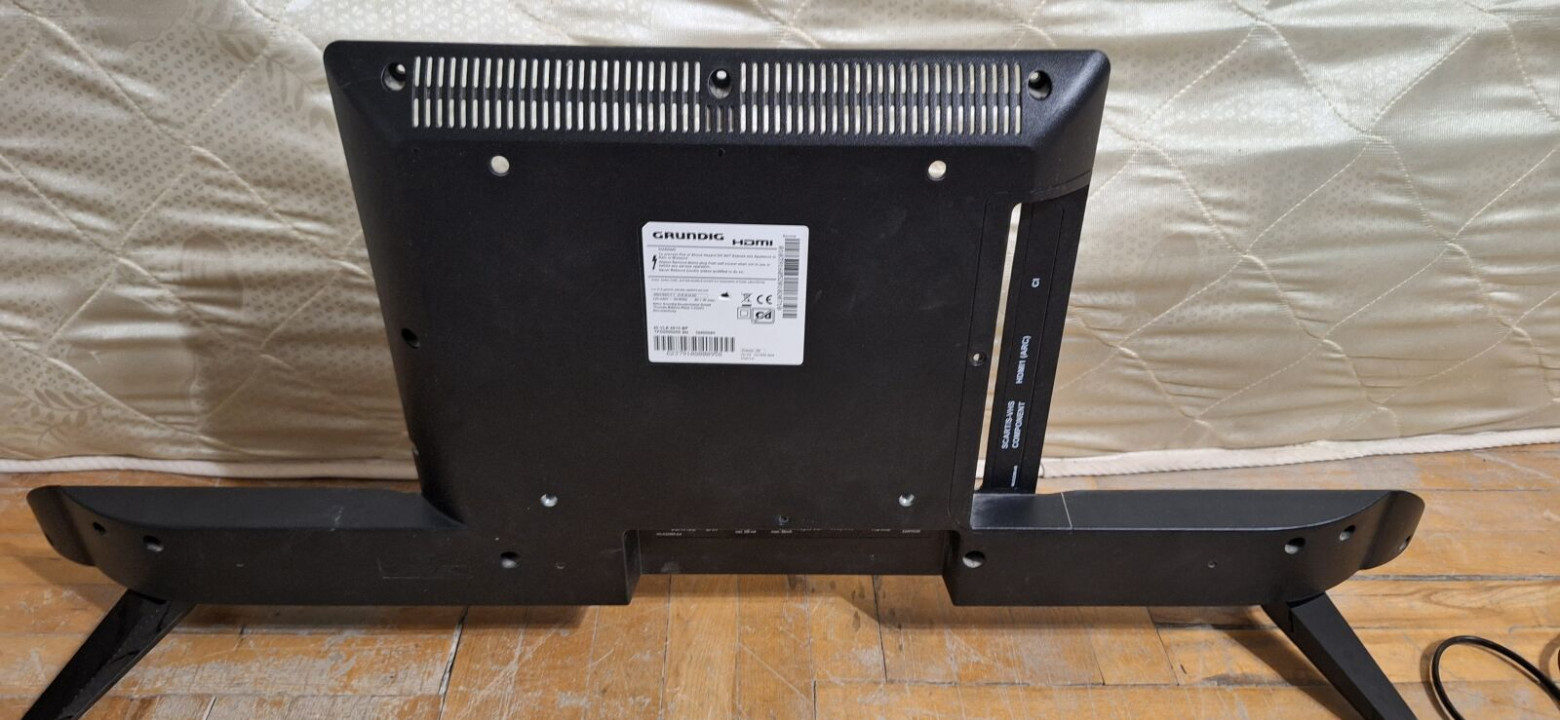
Removed cover with legs
So, let's start the repair. On the specified device, the cover is screwed onto the back. By unscrewing it, we gain access to a single board on which the network power supply, LED driver, tuners, connectors and signal processor are mounted.
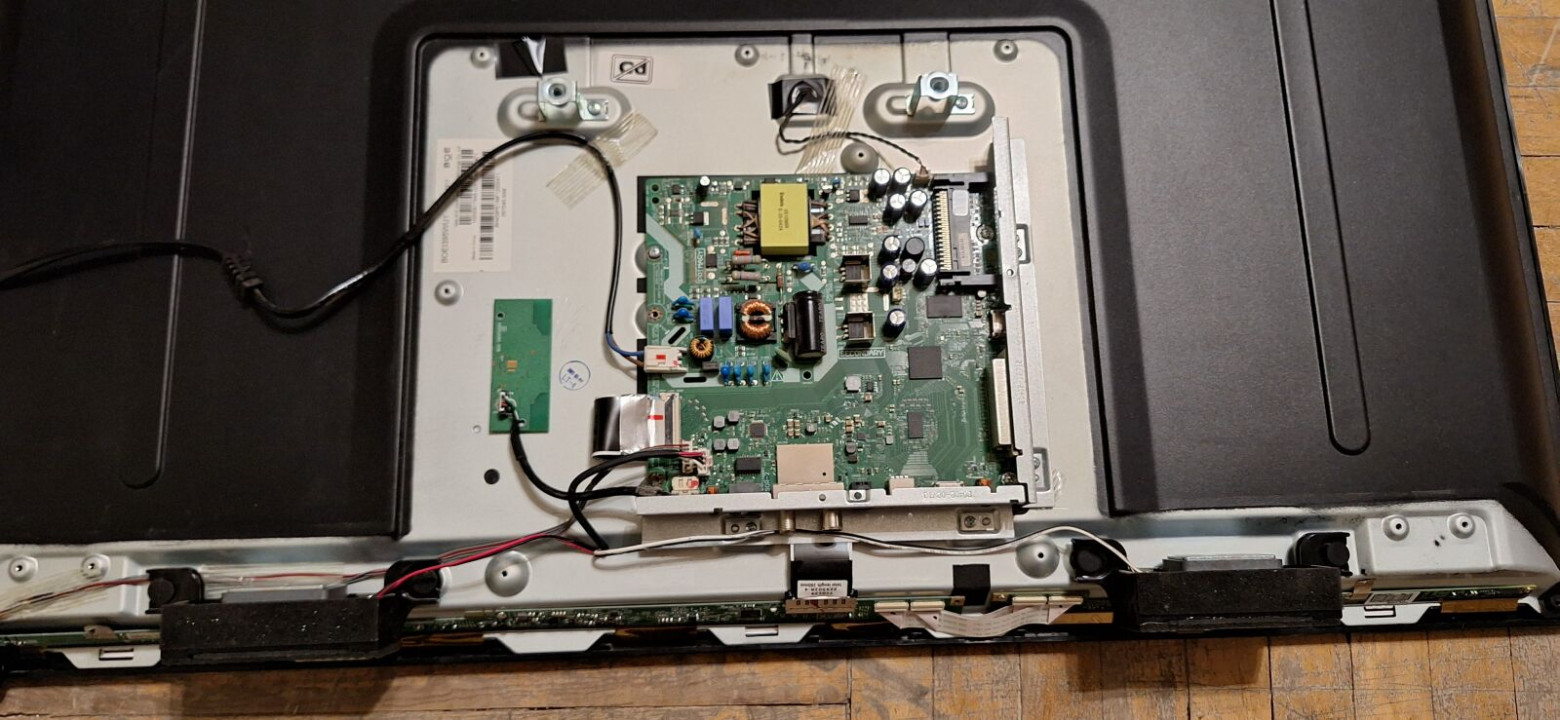
What's inside under the lid
We check the electrolytic capacitors - visually they are intact, not swollen, of course - the device is only three years old. On the outside of the board there are only speakers, an IR remote control photoreceiver with an indication LED, and a WiFi/Bluetooth transceiver board. The control buttons for this model have been eliminated (obviously, in order to reduce the cost as much as possible). From the main board, a signal goes in a wide loop to the matrix board.

Connector to matrix board
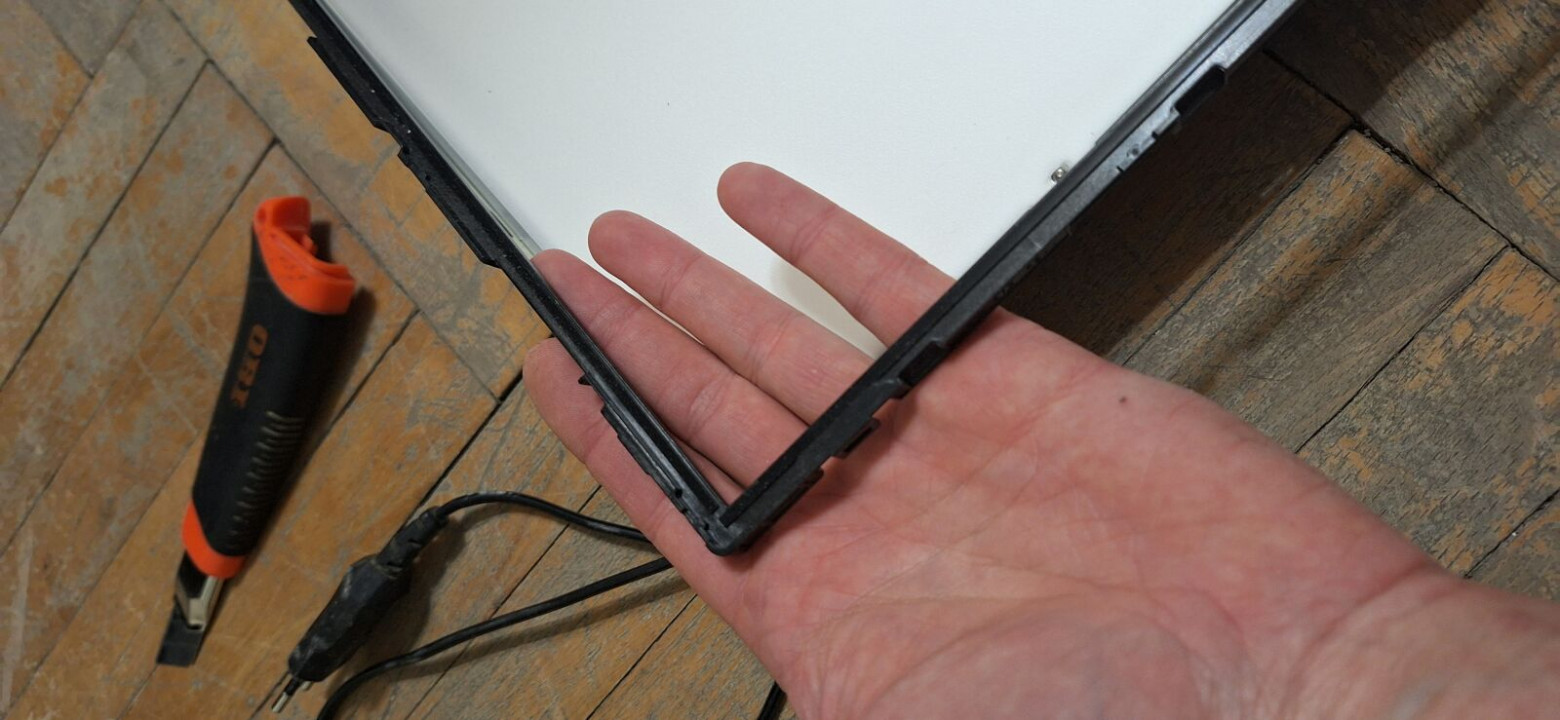
The cable must be carefully disconnected by pressing the latches at the edges of the connector, and the matrix board itself must be disconnected from the case so that it dangles freely on the cables to the matrix. In my case, it is screwed on with three small screws and glued with pieces of conductive tape. We peel off the tape and unscrew the screws.
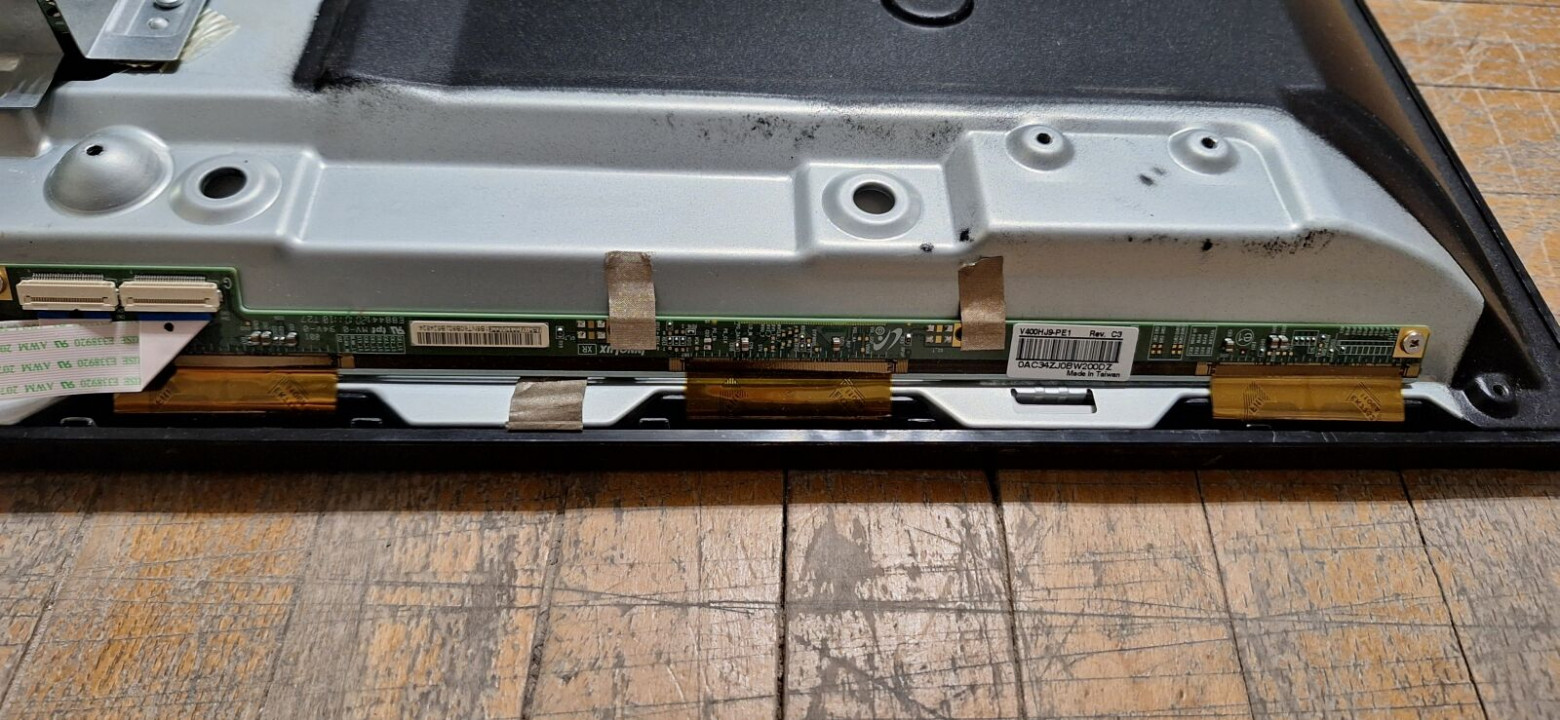
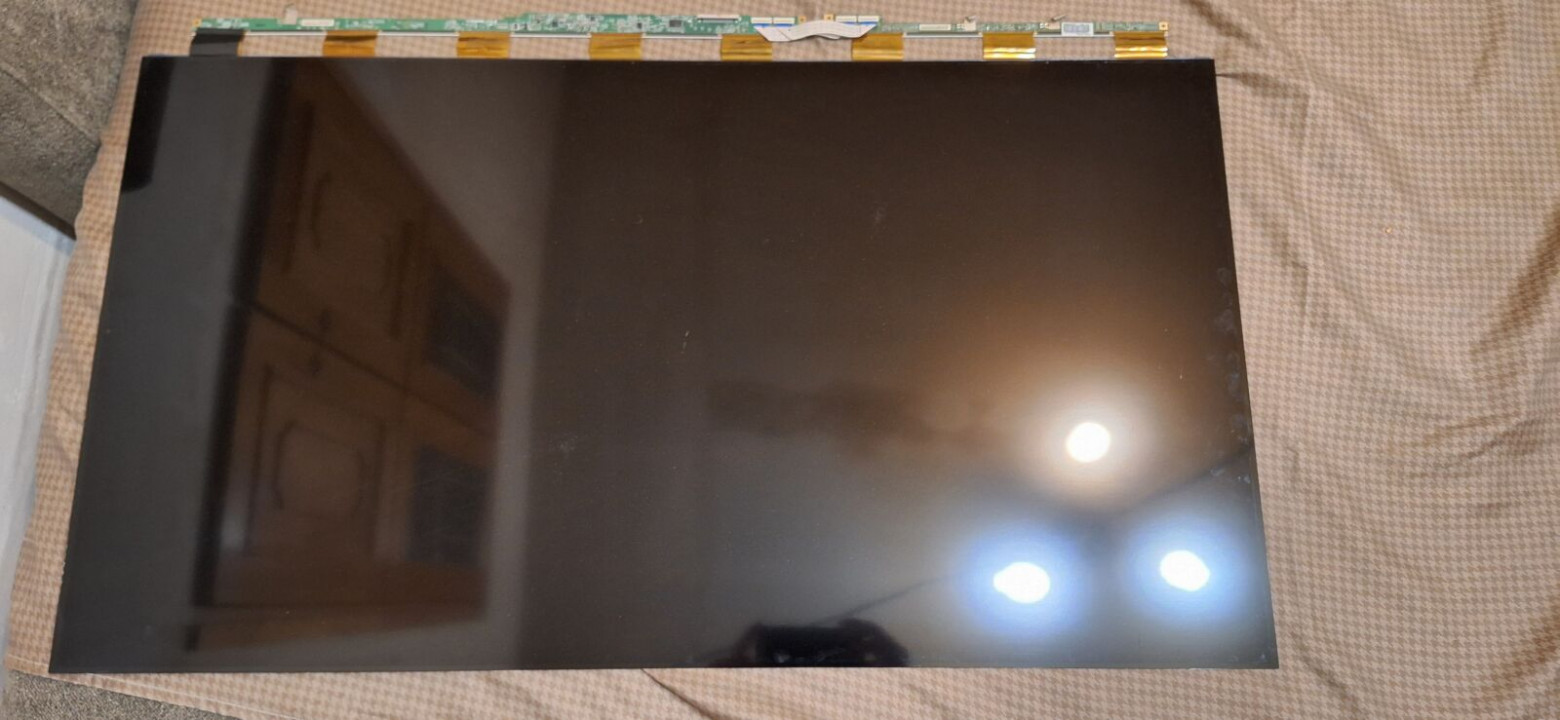
Matrix board
ATTENTION! The cables going to the matrix, as well as the matrix itself, must be handled very carefully! These are extremely fragile parts of the TV.
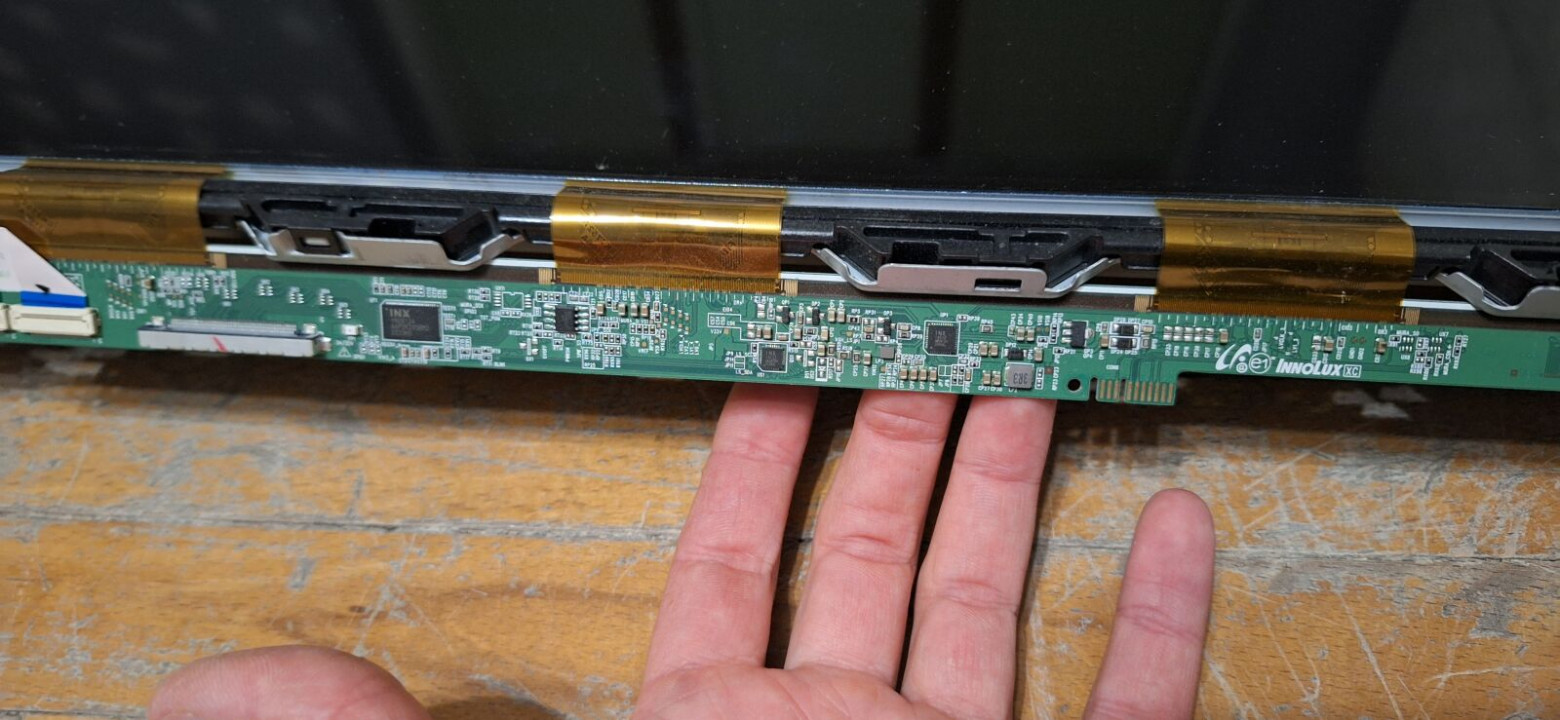
The board is disconnected and dangling loosely
Next, we turn the TV over and try to get to the matrix. This model is so cheap that it has a “trough” in which the LEDs are located and is the body of the TV, and the matrix is held only by the outer decorative frame. Carefully prying this frame sequentially along its entire perimeter, remove it.
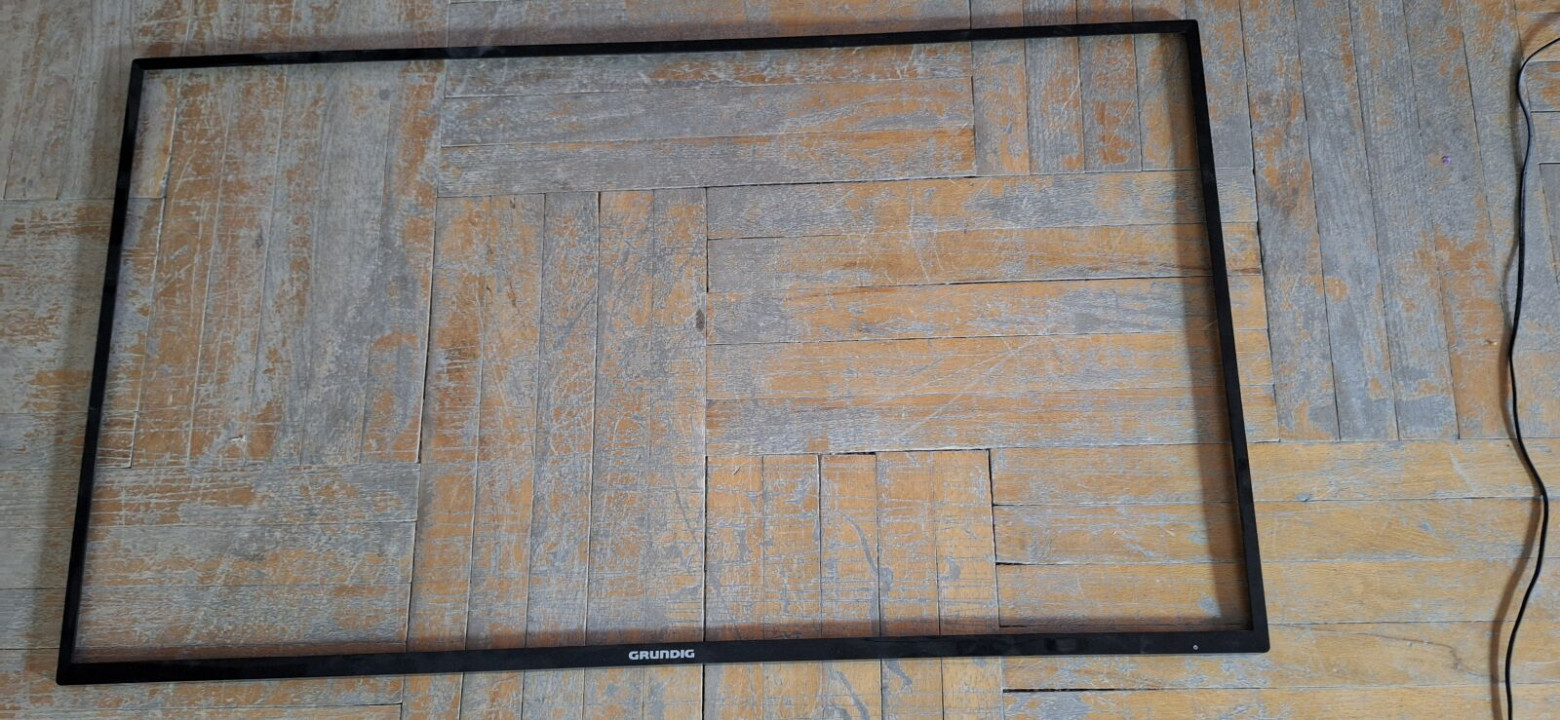
Removed decorative frame
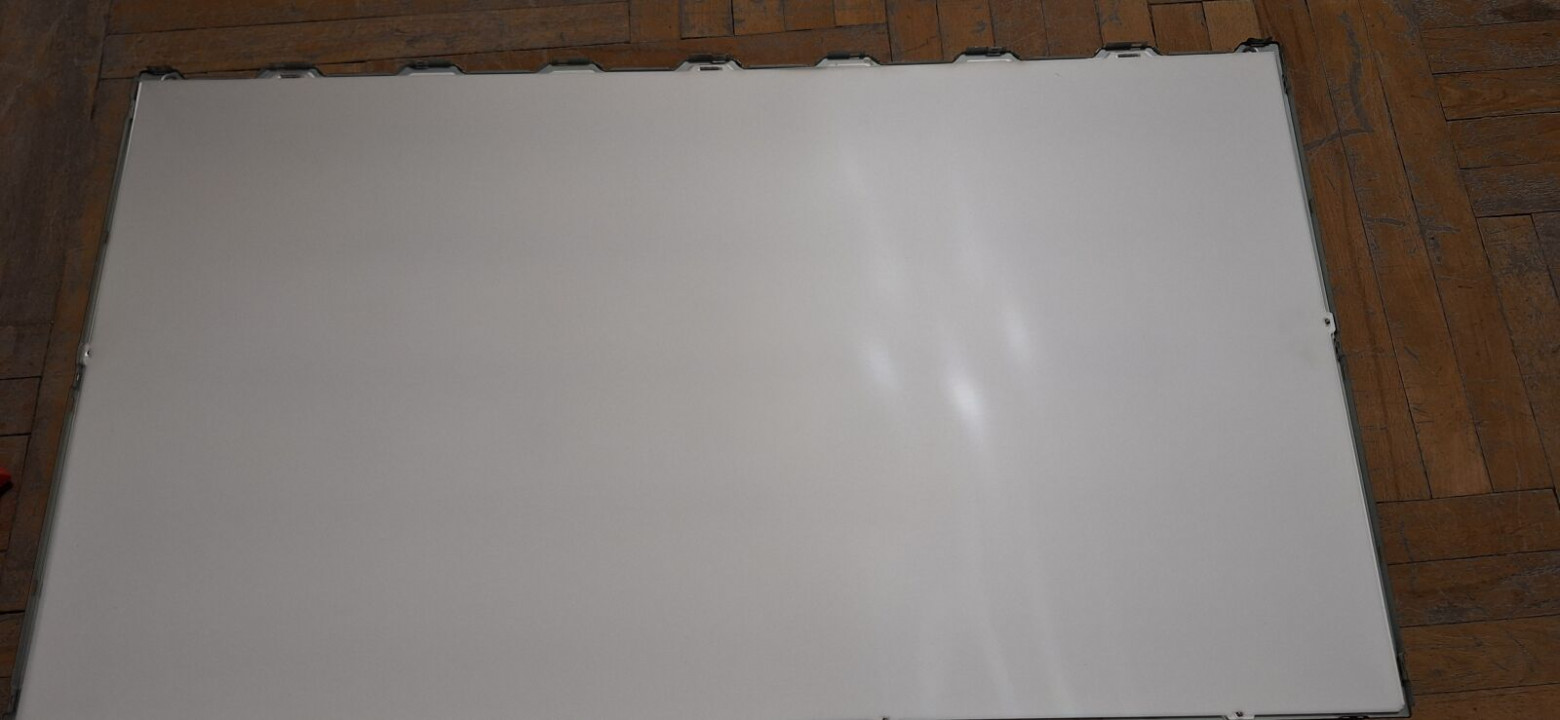
Under the frame we immediately get access to the matrix. The matrix must be very carefully lifted and removed, always with both hands, without allowing it to bend. Matrices with large diagonals are generally best obtained with 4 hands.
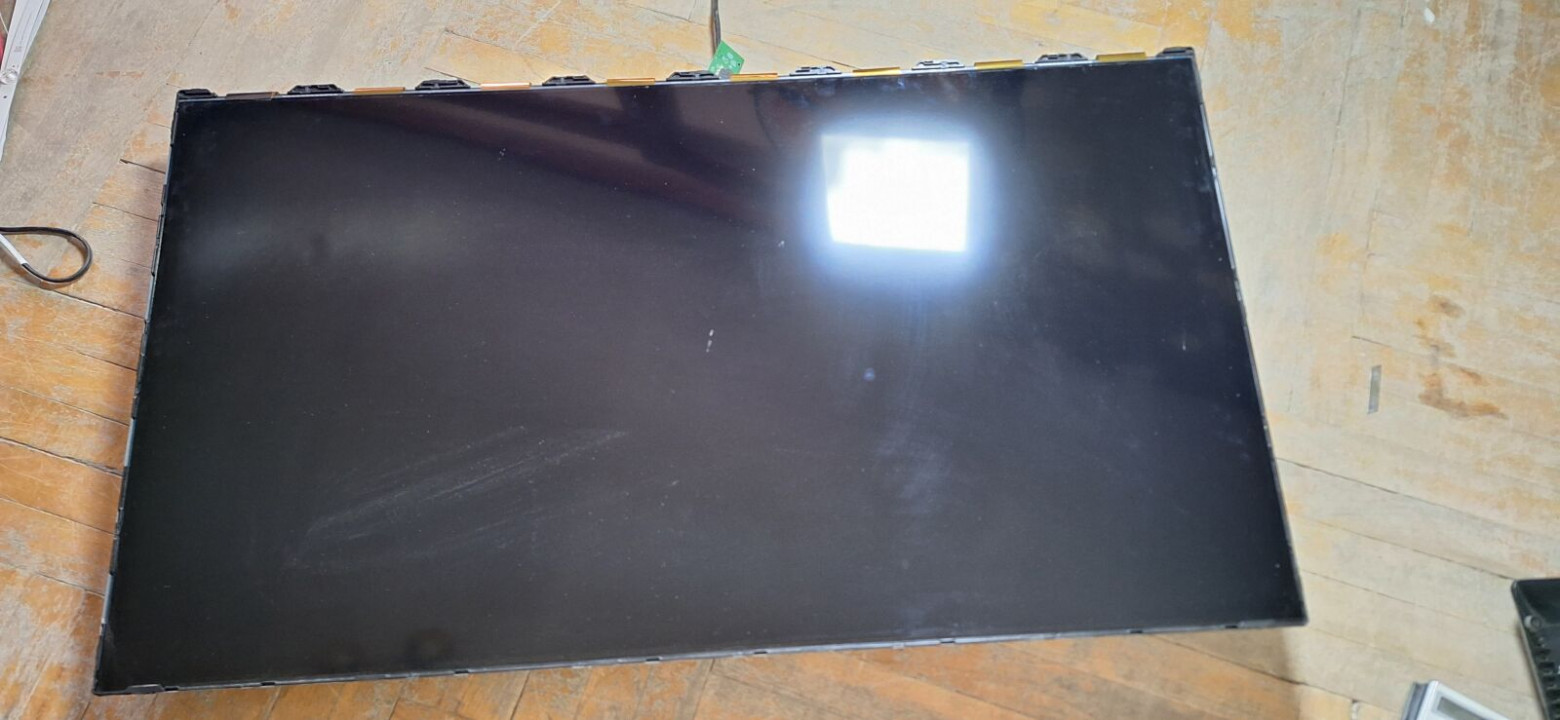
TV with decorative frame removed
Next, you need to place it on a flat, flat surface, such as a table or sofa, away from places where anyone could touch or damage it. To avoid leaving fingerprints on the surface, it makes sense to wear gloves.
Removed matrix
Now we have access to the diffuser. To remove it, you need to pull out the spacer frame, which provides a gap between the diffuser and the matrix. This frame is also secured with latches and can be easily removed. When removing the diffuser sheets, it is extremely important not to mix them up and then lay them on the same side as before. Therefore, we take and remove the entire pack and place it with the same side next to the matrix somewhere on the sofa.
Diffuser spacer frame
Diffuser can be removed
And now, finally, we get to the LEDs. Using the above method, we look for a burnt-out LED and short-circuit it. When the power is turned on, the backlight LEDs light up. But this may not last long; the processor may notice the absence of the matrix and turn off the backlight, going into emergency mode. However, in my model the processor doesn’t care about the lack of a matrix and the backlight shines.
While the backlight is on, you need to have time to measure the voltage on one LED and on all the lines. In my case, the voltage on the LED turned out to be approximately 2.65 V, and on a line of 7 LEDs ~18.5 V, on all three lines only ~56 V. How can I get a 12-volt LED strip here? Very simple! You need to take 5 identical pieces and turn them on in series. 5 * 12 V = 60 V, which is very close to 56. Since the LED driver stabilizes the current, it will easily adjust the output voltage to the desired tape. On TVs with a different number of LEDs, the number of segments connected in series will be different.
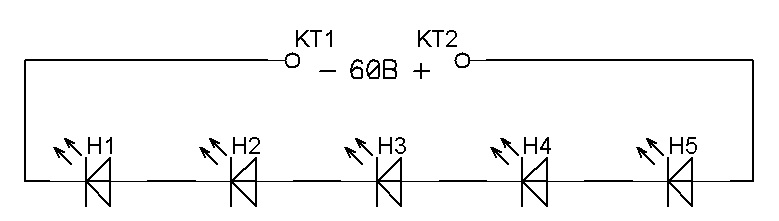
Here H1-H5 indicate identical pieces of 12-volt tape
The width of the trough recess is approximately 80 cm, so a tape 5 * 0.8 m long = 4 m is needed. Therefore, I bought a 5-meter piece of tape at the store. The tape must be selected with the rarest arrangement of LEDs (60 LEDs per meter, power indicated on the package is ~4.2 W/m) and the coldest glow color (6500 K).
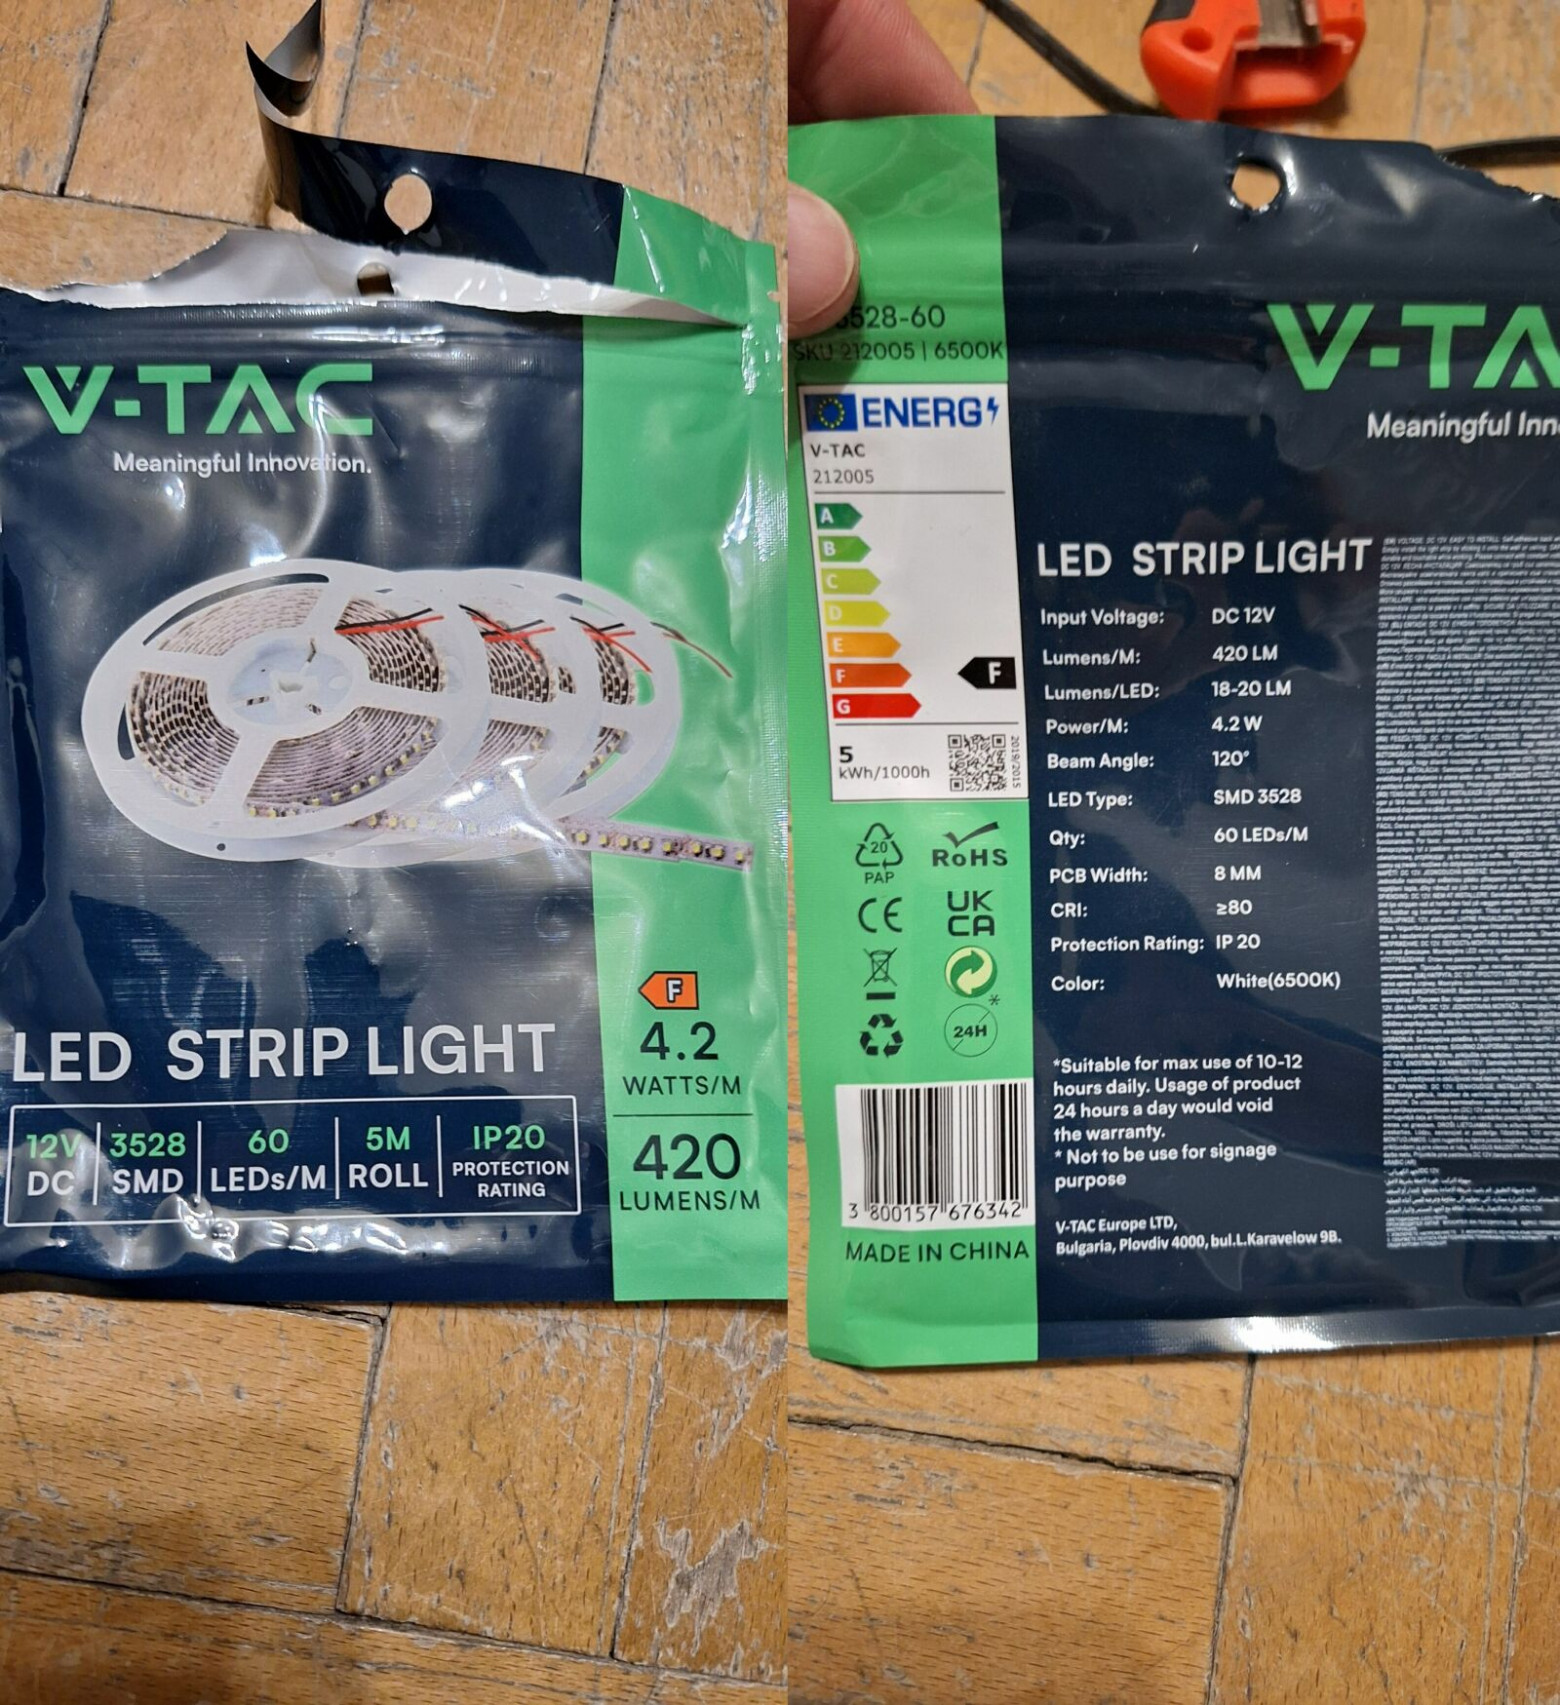
Tape and its characteristics
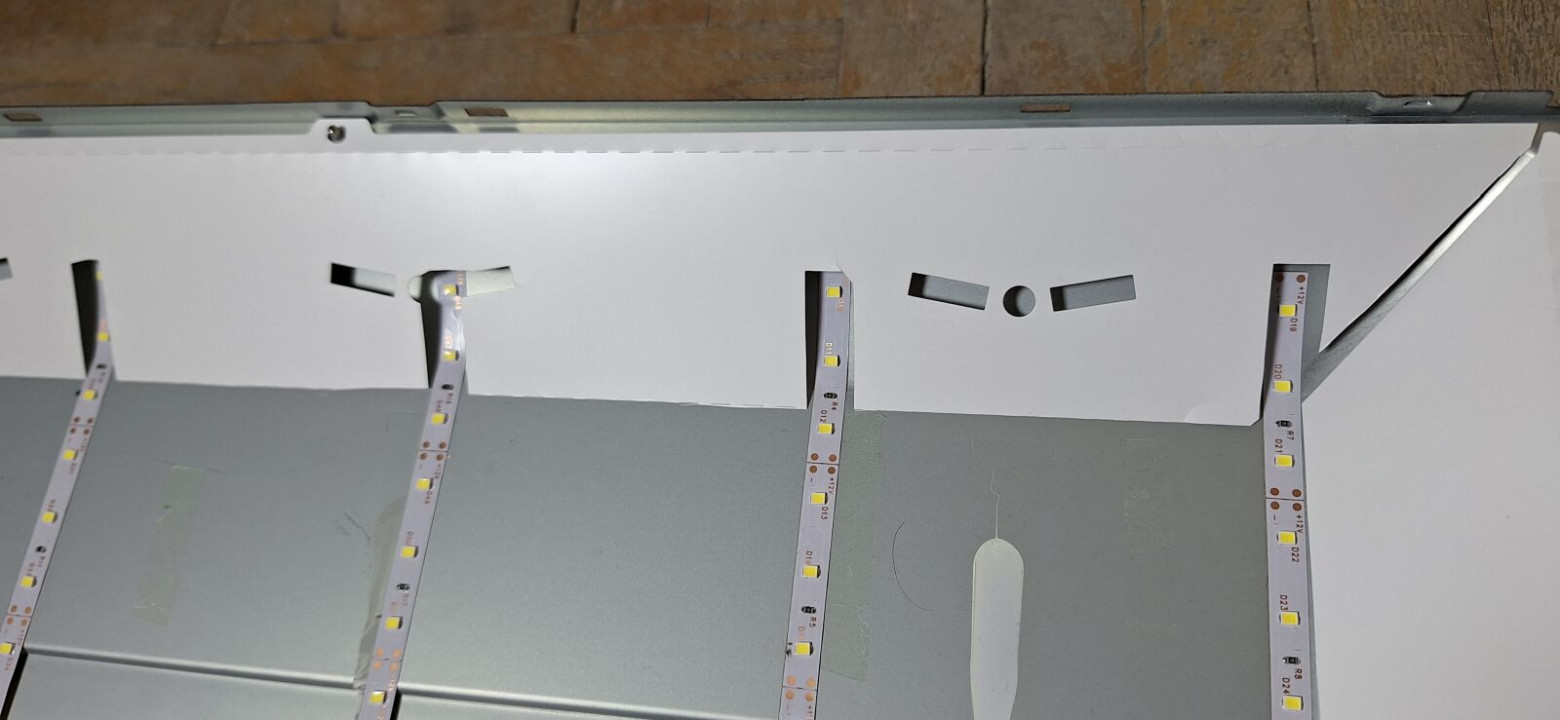
We remove the additional white reflector from the bottom of the “trough”. This reflector re-reflects the light reflected from the diffuser. It is usually attached with double-sided tape and comes off easily. But we need to tear it off carefully, it will be useful to us later. After this, we glue pre-cut pieces of tape to the bottom of the “trough” at equal distances. We connect the wiring from the old strips into a circuit. It is better to connect in the middle of the segment to reduce the unevenness of the glow associated with the voltage drop on the tape itself.
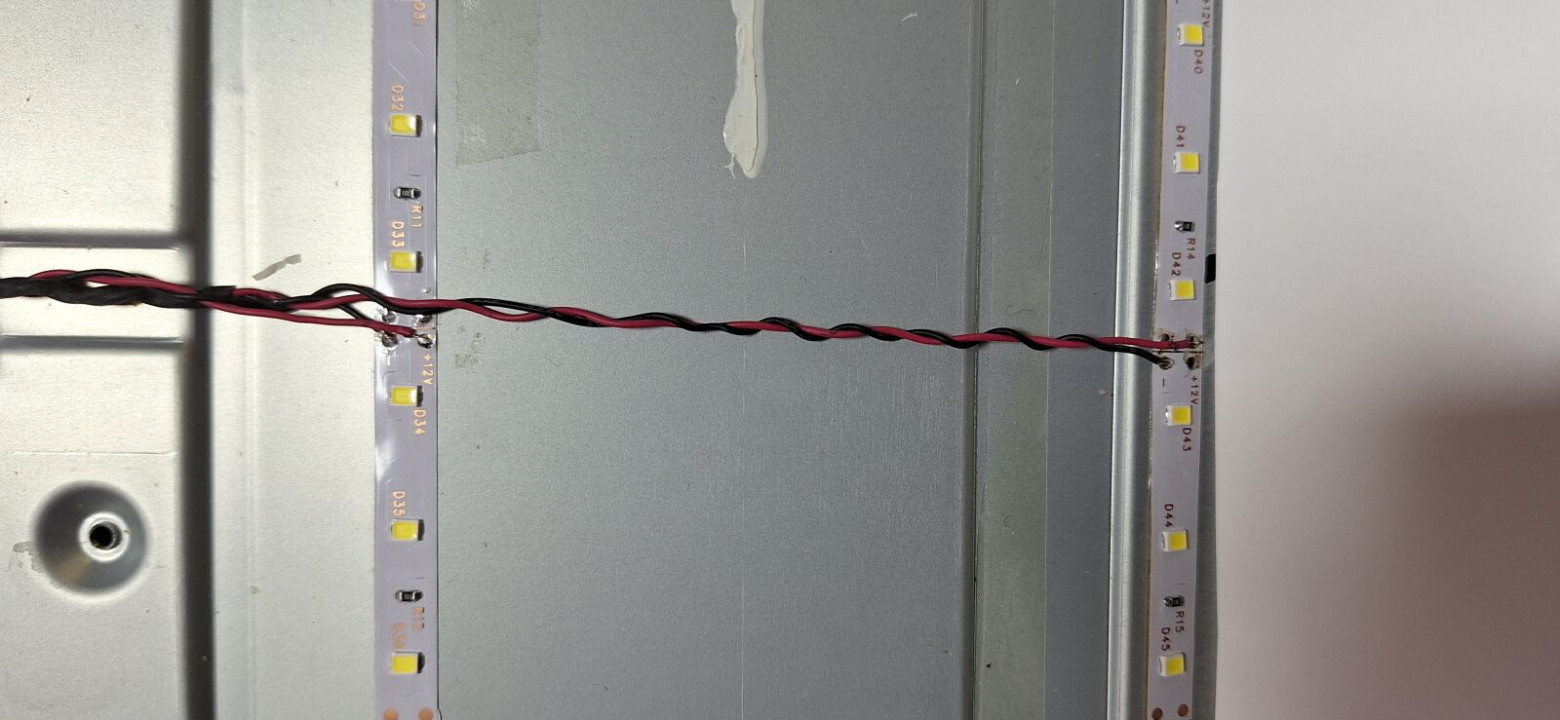
Installation of tape and wires
At first I installed 5 pieces of tape.
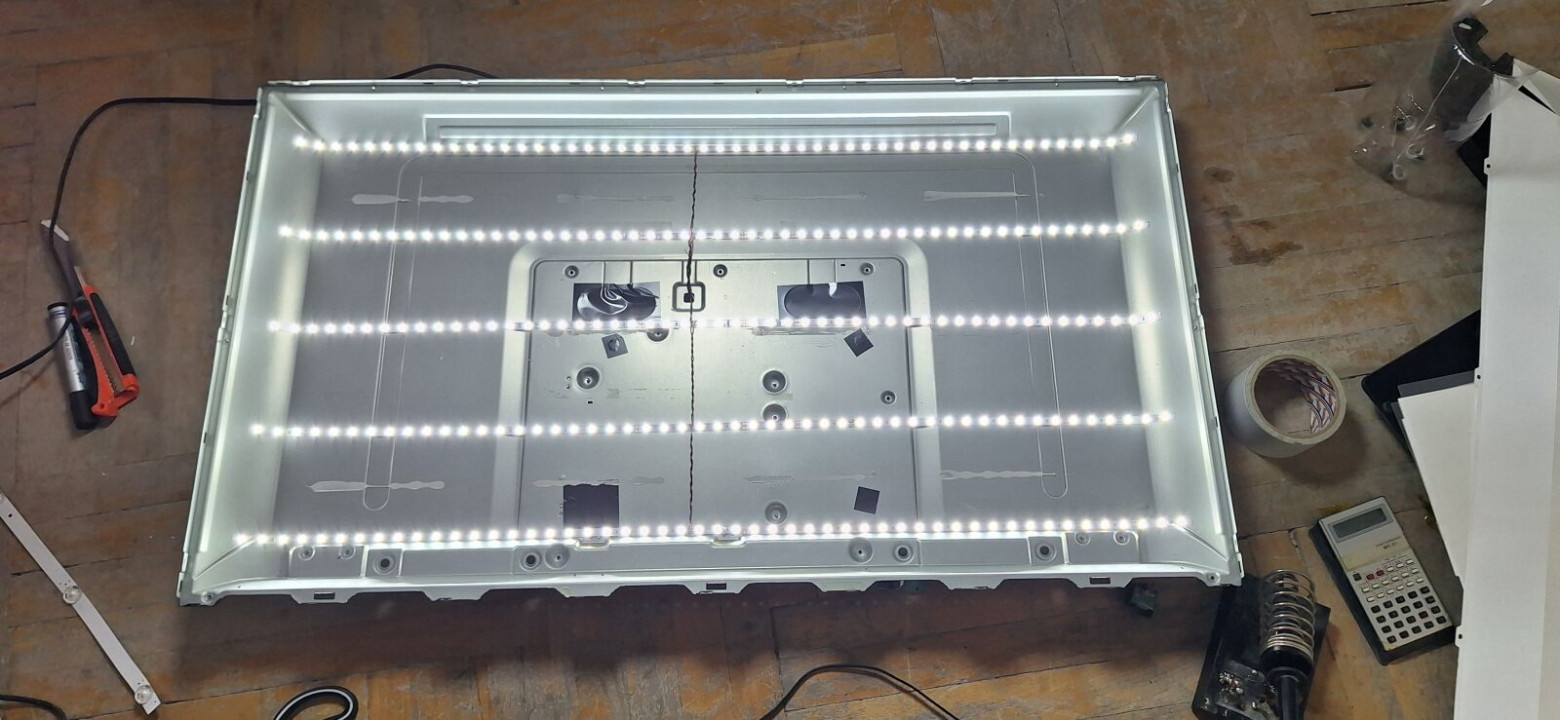
Option with five segments
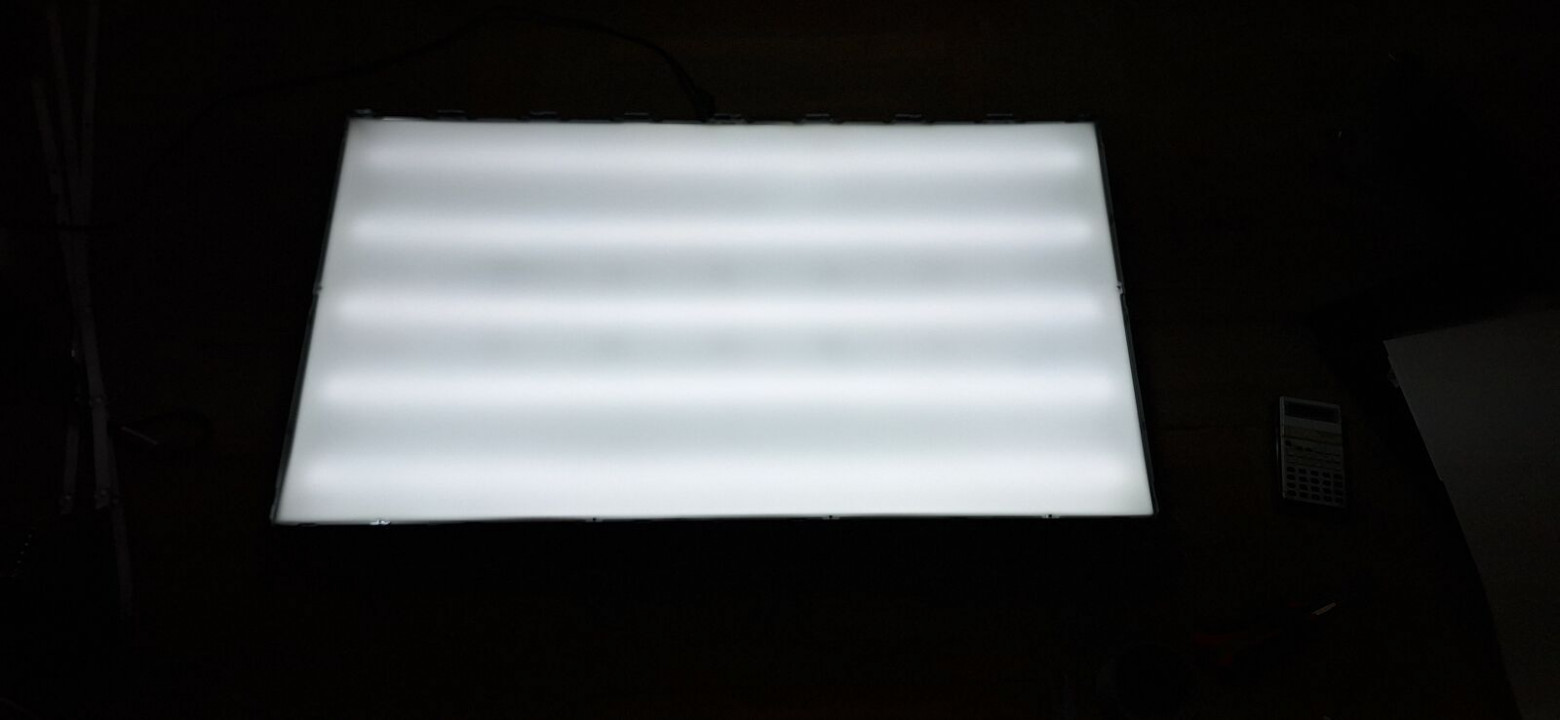
What it looks like on the diffuser
The result was satisfactory, the image appeared on the matrix as expected.
Backlight unevenness
The illumination unevenness with five segments is especially visible in uniform images. When watching films with dynamic pictures, heterogeneity is practically not noticeable.
Unevenness in a dynamic picture
I bought another 5 meters of the same tape and pasted the pieces twice as often. At the same time, adjacent pairs of segments were connected in parallel, and all 5 resulting pairs were connected in series. So that in the end all segments are under the same current and voltage.
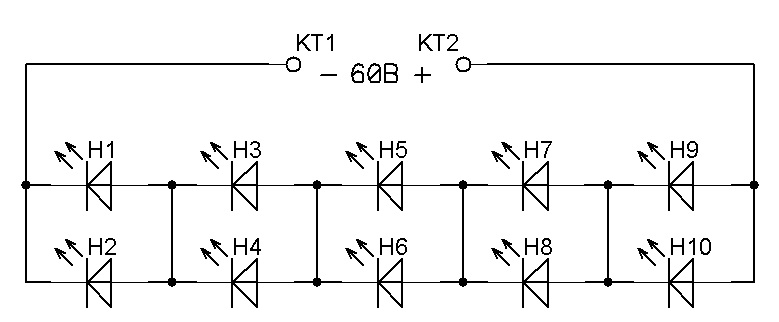
Here H1-H10 indicate identical pieces of 12-volt tape
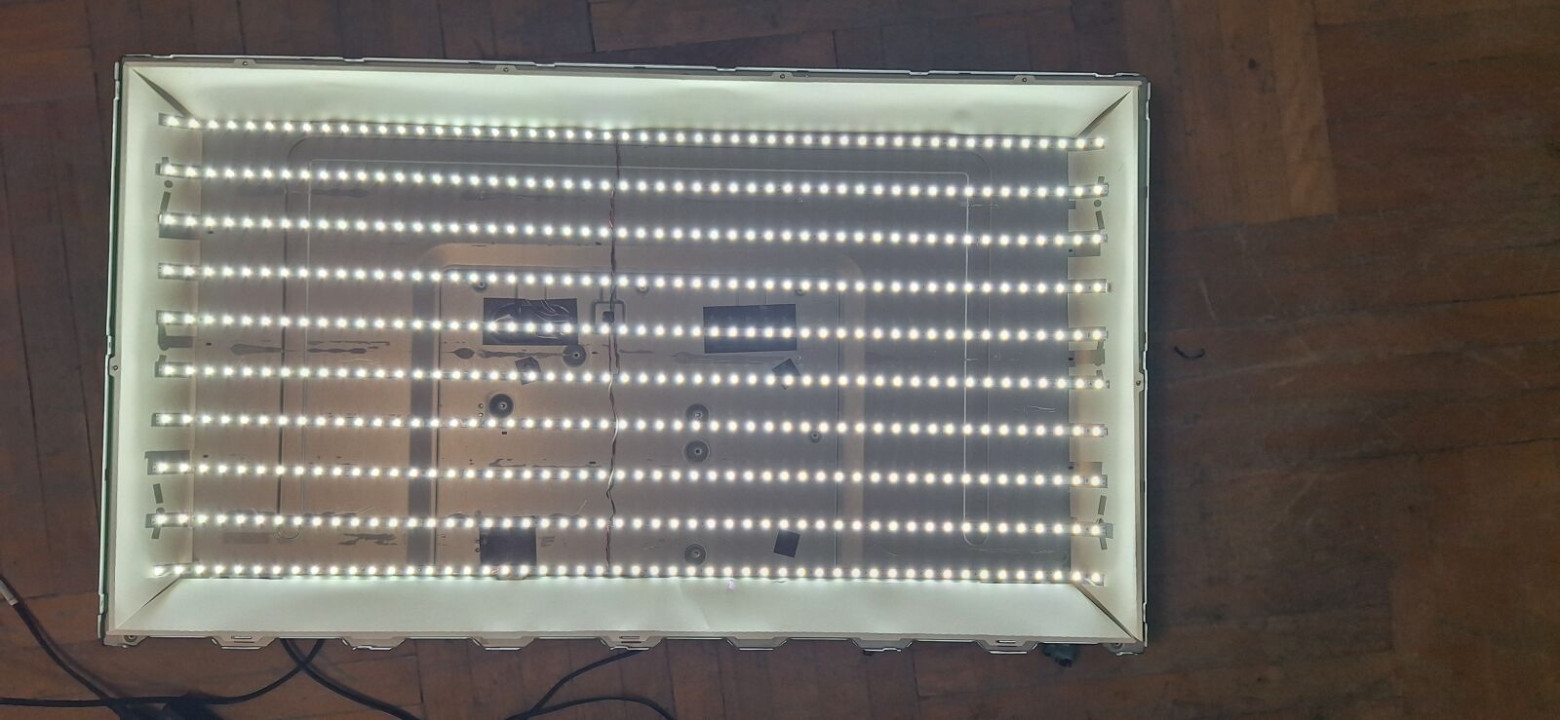
Option with ten pieces of tape
What it looks like on the diffuser
What it looks like on the diffuser
In a dynamic picture
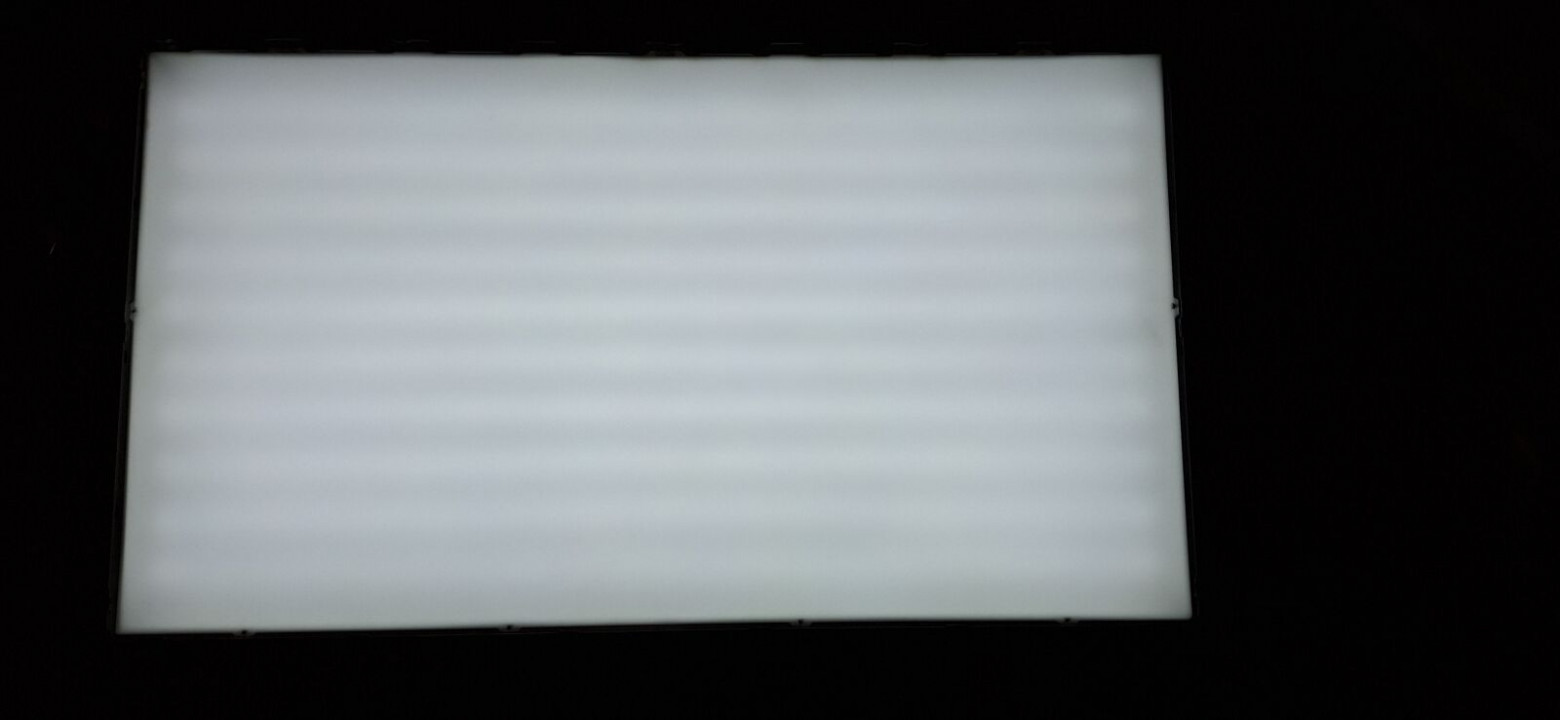
As you can see, with ten segments on a uniform picture, the unevenness of the illumination has become almost invisible. In the picture from the film, the unevenness is not noticeable at all.
You can probably go even further and glue 5 more segments according to the scheme of 5 groups in series, each group has 3 segments in parallel, as in the diagram below.
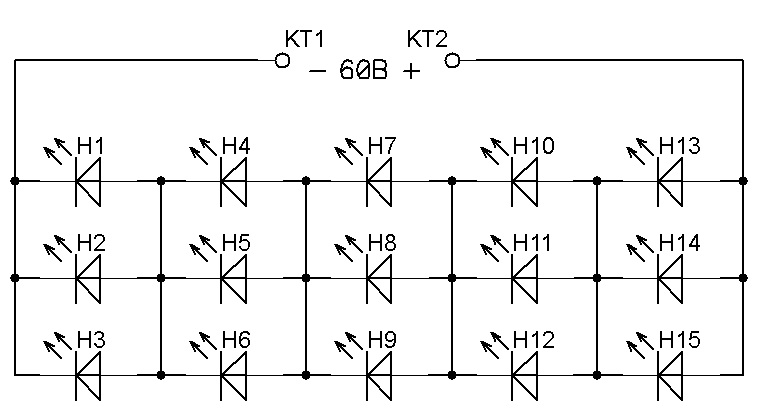
Here H1-H15 indicate identical pieces of 12-volt tape
In this case, the distance between the LEDs on the strip will be almost equal to the distance between the strips and the LED matrix will become almost symmetrical. Then the uniformity of illumination in all directions will become the same. But I was quite satisfied with the previous option.
We cut the previously removed reflector into strips and seal the gaps between the strips with double-sided tape, and also glue the pieces of the reflector around the perimeter.
In principle, you don’t have to bother with this, it will only slightly worsen the uniformity of illumination.
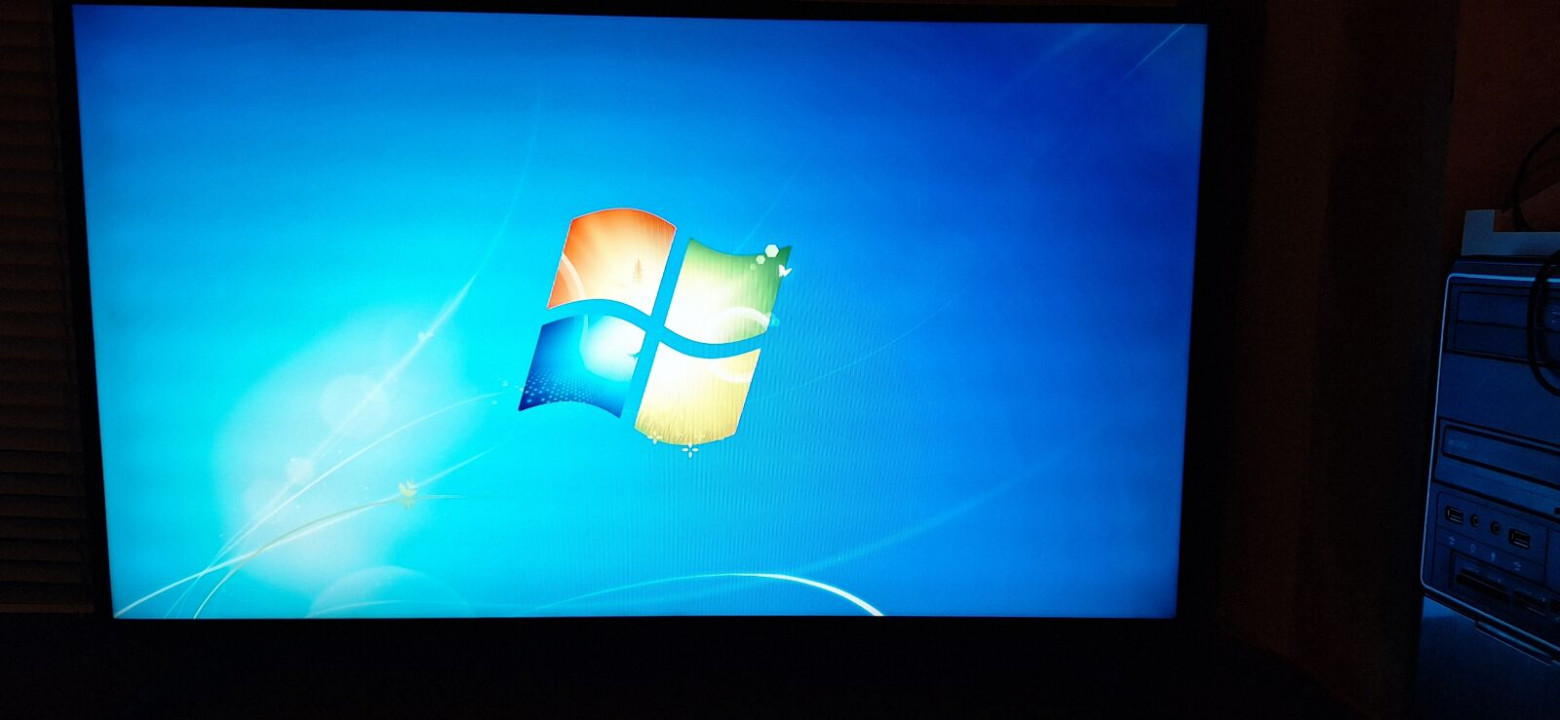
Next, we assemble the TV in reverse order. We put the diffuser in its place, then the spacer frame, then the matrix and snap the decorative frame into place. Before final assembly, we perform a test switch on. Everything works. We finally assemble it by screwing the back cover into place.
Total: costs for the LED strip: ~600 rubles, time costs: ~4 hours. The only tools needed are screwdrivers, a soldering iron, and a multimeter.
This is how you can restore your TV to working order relatively quickly and inexpensively.
News, product reviews and competitions from the Timeweb.Cloud team - in our Telegram channel ↩

Read also:
- ➤ Reverse engineering and repair of charger board
- ➤ We create an audiobook generator with personal translation
- ➤ How I bought a non-working fake iPhone 14 Pro Max for nothing and ported pure Android to it
- ➤ Not (loneliness online) NOW
- ➤ I recommend playing: Cats and the Other Lives
Why This Matters In Practice
Beyond the original publication, Deshman TV repair matters because teams need reusable decision patterns, not one-off anecdotes. Now all stores and online trading platforms are filled with inexpensive LED TVs from little-known companies with unpronounceable names. Prog...
Operational Takeaways
- Separate core principles from context-specific details before implementation.
- Define measurable success criteria before adopting the approach.
- Validate assumptions on a small scope, then scale based on evidence.
Quick Applicability Checklist
- Can this be reproduced with your current team and constraints?
- Do you have observable signals to confirm improvement?
- What trade-off (speed, cost, complexity, risk) are you accepting?
FAQ
What is this article about in one sentence?
This article explains the core idea in practical terms and focuses on what you can apply in real work.
Who is this article for?
It is written for engineers, technical leaders, and curious readers who want a clear, implementation-focused explanation.
What should I read next?
Use the related articles below to continue with closely connected topics and concrete examples.