DIY Hacking Together a New Water Pump
A developer reverse-engineers and repairs a defective wireless water pump, bypassing its broken microcontroller with a solid-state relay and fixing the charging circuit's LED indicator along the way.
Recently I bought a "wireless water pump" on a marketplace. One of those gadgets that sits on top of a 19-liter water bottle and dispenses water at the push of a button. Convenient, modern, and — as it turned out — completely non-functional right out of the box.
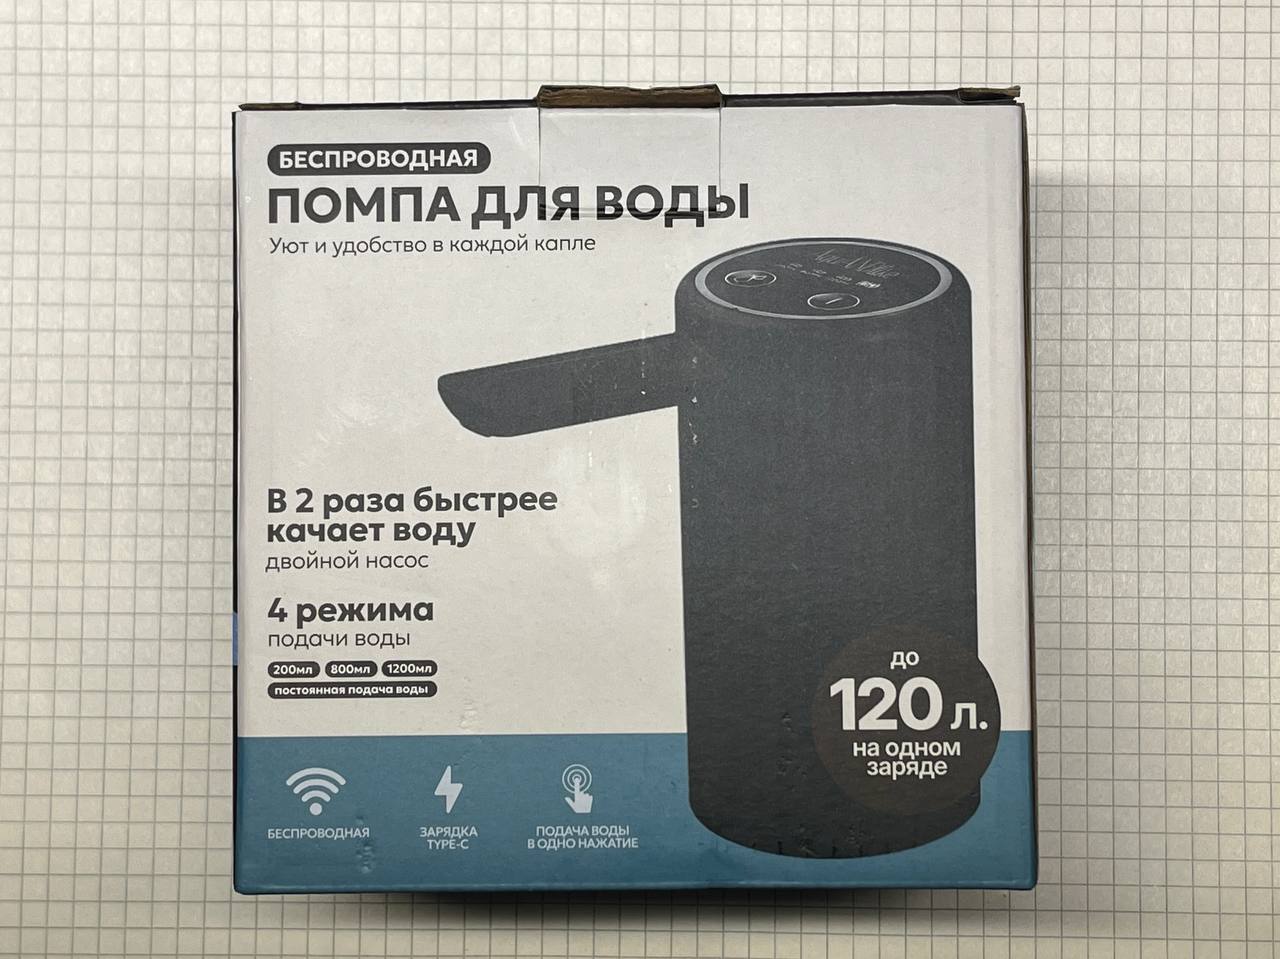
After some back and forth with the seller, I received a refund and was told to keep the device. Most people would have thrown it away. I decided to take it apart.
What's Inside
Disassembling the pump housing revealed the following components:
- An 18650 lithium-ion battery
- Two motors (one for pumping, presumably a spare or for different modes)
- A control board with an unmarked microcontroller
- Standard charging and motor control circuitry
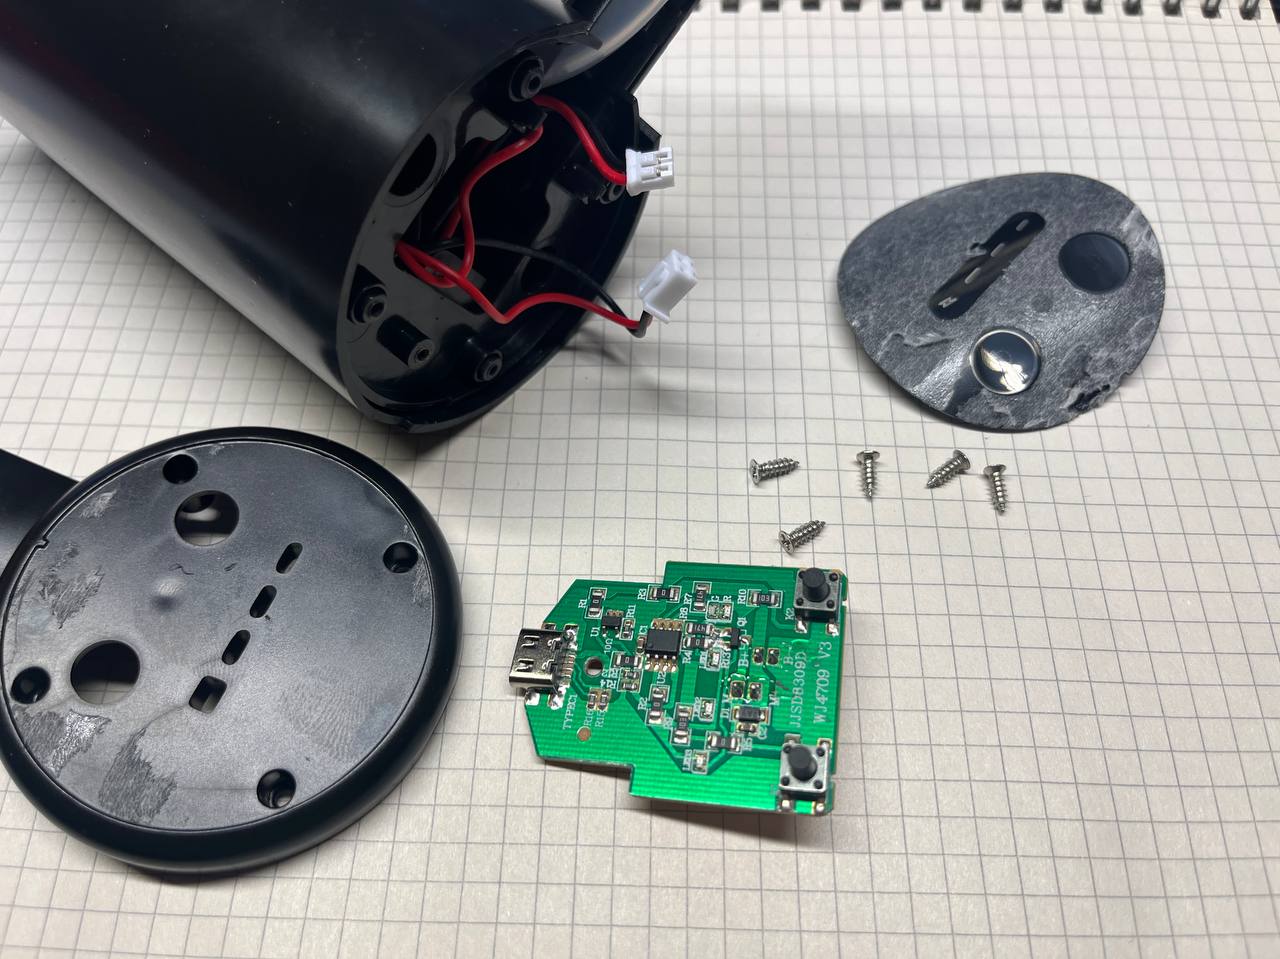
The motors were managed through an N-channel MOSFET transistor, controlled by the microcontroller. Simple enough in theory.
First Attempt
For starters I tried resoldering everything with a soldering iron. Maybe something wasn't making proper contact — cold joints are a common manufacturing defect in cheap electronics. Unfortunately, this initial attempt proved unsuccessful. The pump remained dead.
Technical Analysis
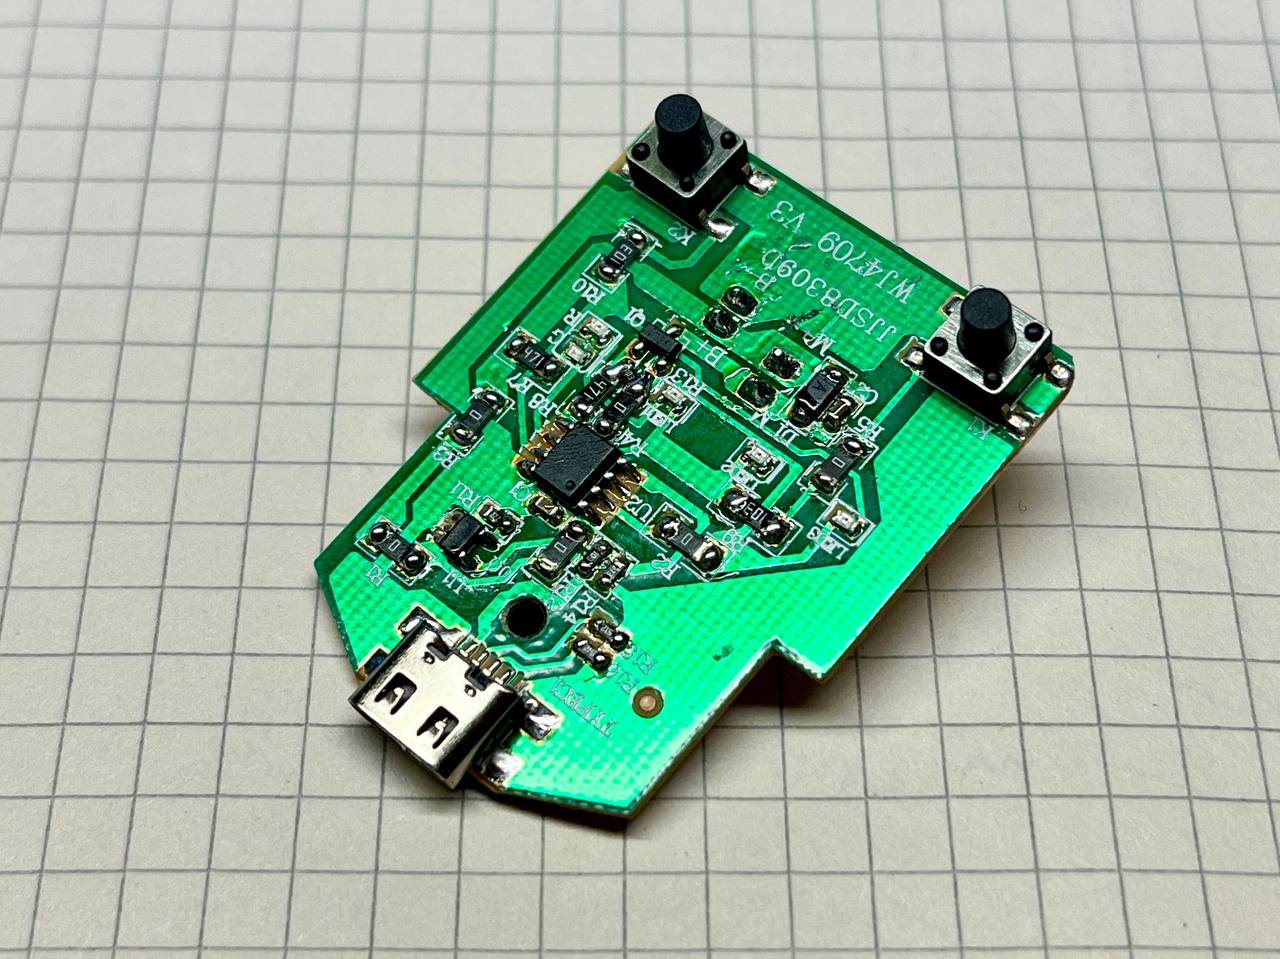
Time to get serious. I traced the circuit board and identified several design flaws in the original implementation:

Problem 1: Charging Circuit Mismatch
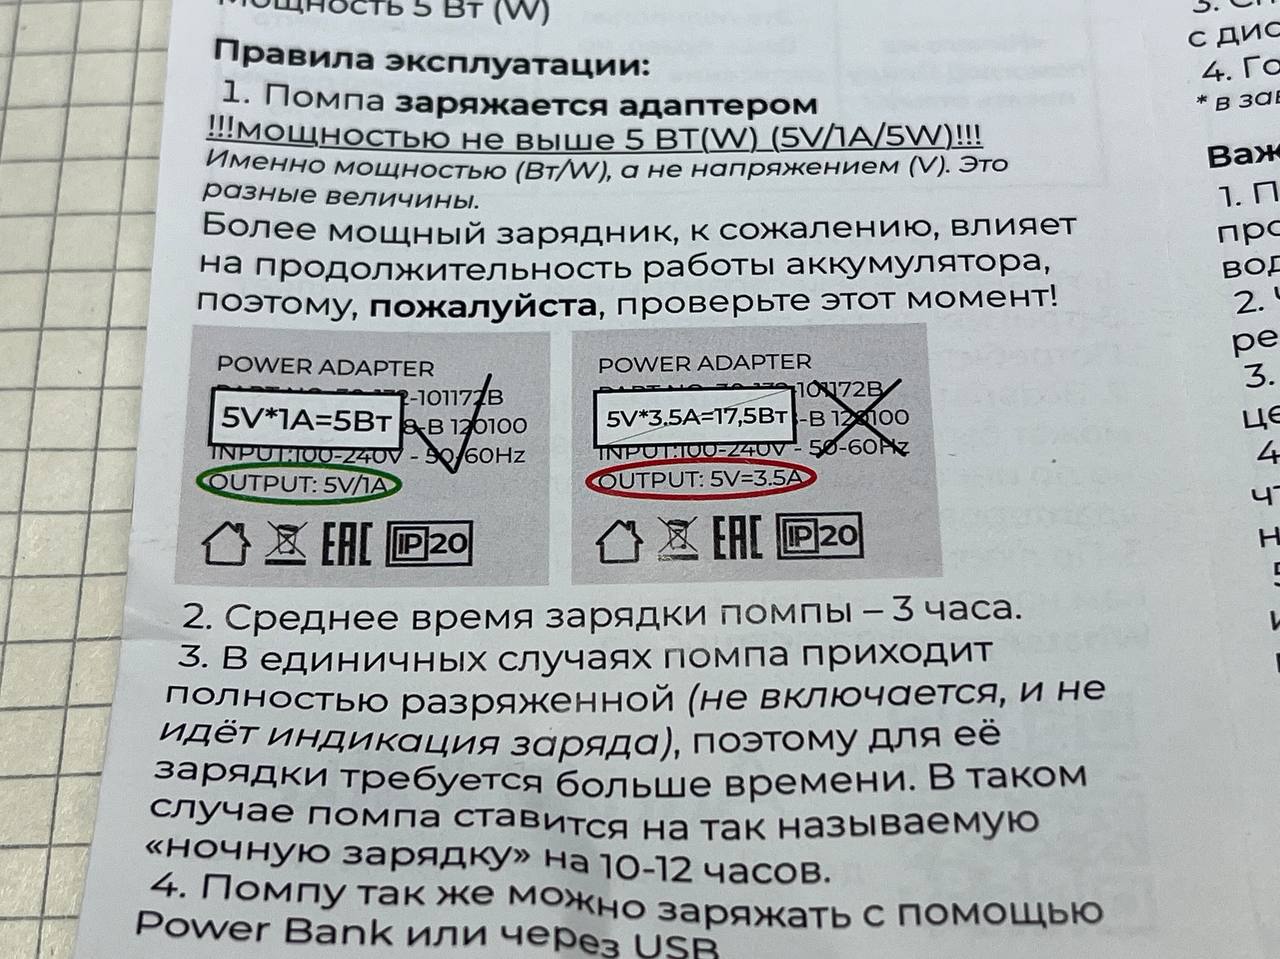
The instructions that came with the pump specified a 5V/1A/5W input for charging. However, the board contained a TP4054 charging controller with a 2.2k ohm resistor on the PROG pin. According to the TP4054 datasheet, this resistor value sets the charging current to approximately 540mA — barely half of what the instructions claimed. Not dangerous, but misleading.
Problem 2: Useless Status LED
The CHRG pin on the TP4054 charging controller wasn't connected to anything. This pin goes low when the battery is charging and goes high-impedance when charging is complete. Because it was left floating, the red LED remained lit constantly during charging with no indication of when charging was actually done. A completely useless status indicator.
The Real Problem: Dead Microcontroller
The unmarked microcontroller was the root cause. It simply wasn't sending any signals to the MOSFET gate. Whether it was dead on arrival or died at some point, the result was the same: no motor control.
The Fix
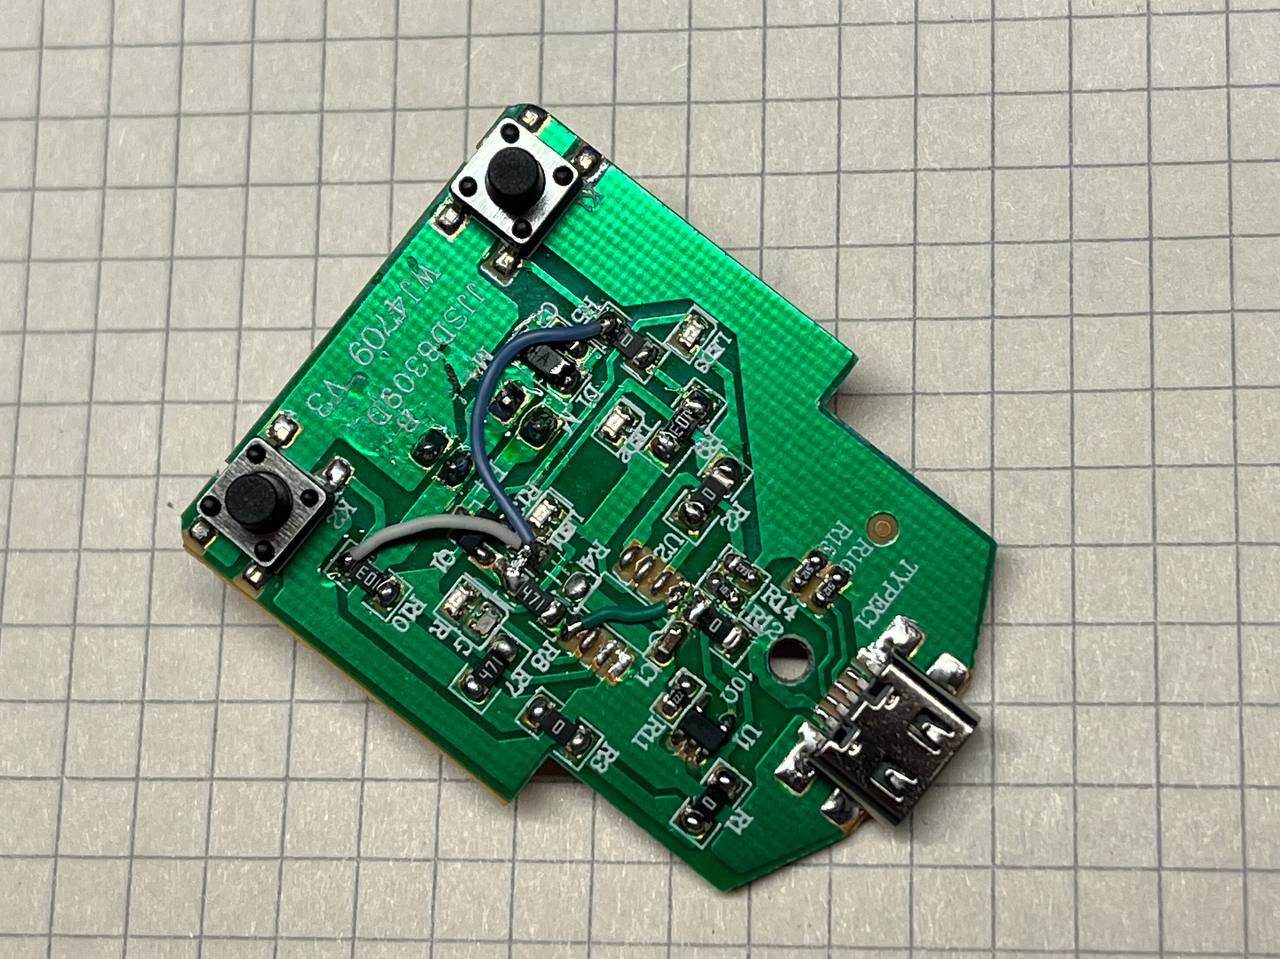
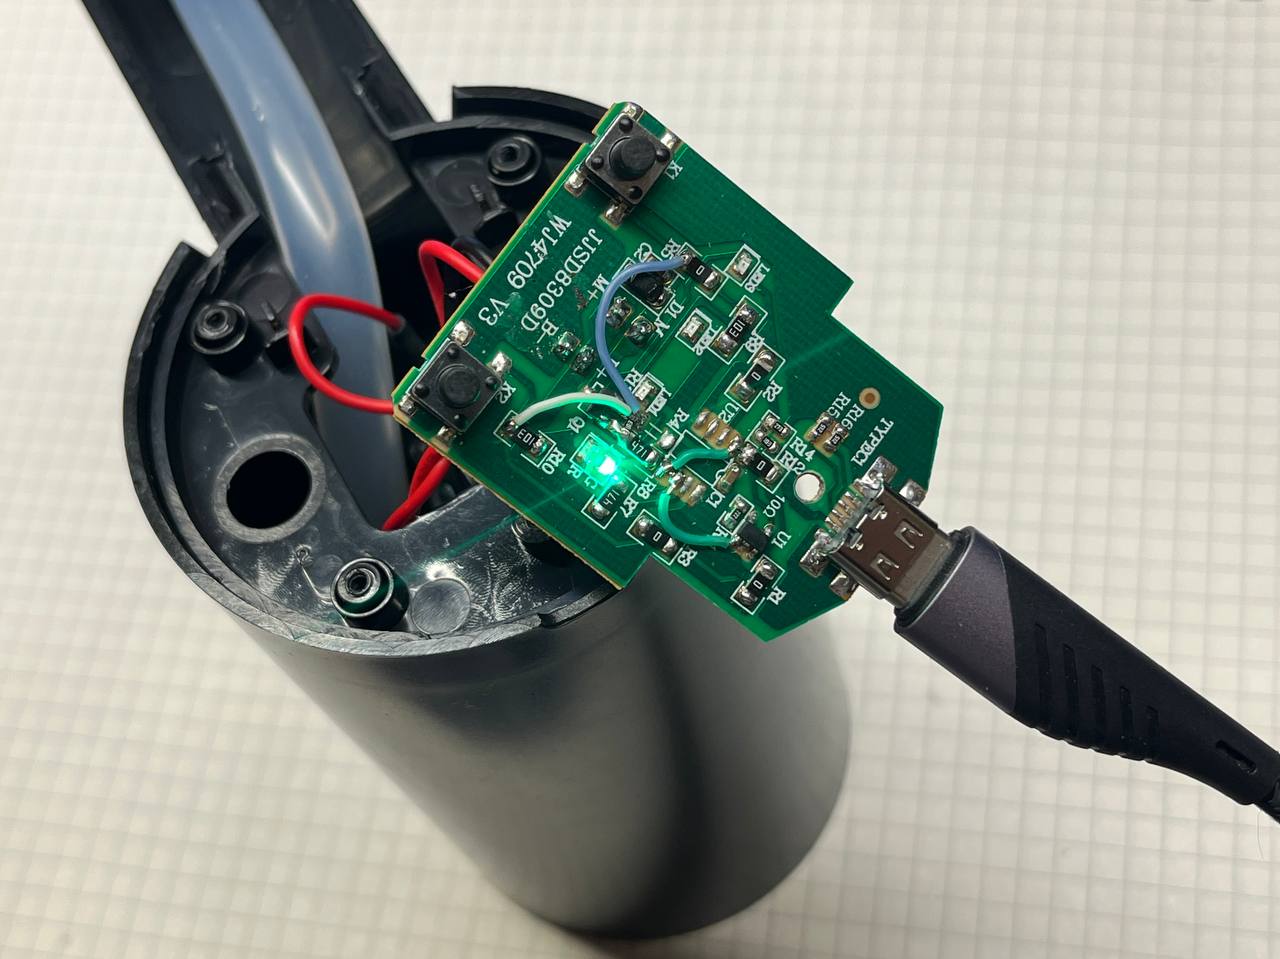
LED Indicator
First, the easy fix. I connected the CHRG pin to a green LED through a resistor. Now the pump has proper charge status indication: red LED while charging, green LED when complete.

Bypassing the Microcontroller
Rather than trying to replace the unmarked (and therefore unidentifiable) microcontroller, I implemented a much simpler solution. The pump only needs to do one thing: turn motors on when a button is pressed, turn them off when it's released. No microcontroller needed.
I used a KAQY212S solid-state relay (essentially an opto-isolator with a MOSFET output). The existing buttons on the pump were wired in parallel. Here's the clever part: the buttons connect to ground on one side. So I disconnected the MOSFET source from GND — the Chinese manufacturers conveniently included a resistor R4 in that path, making it easy to isolate.
The modifications were:
- Removed resistor R10 to disconnect the parallel button paths from the dead microcontroller
- Connected a 1k ohm resistor from the buttons to ground (for the relay LED)
- Ran the relay LED positive terminal to battery positive
- Connected the relay output to control the MOSFET gate via the existing 470 ohm resistor already on the board
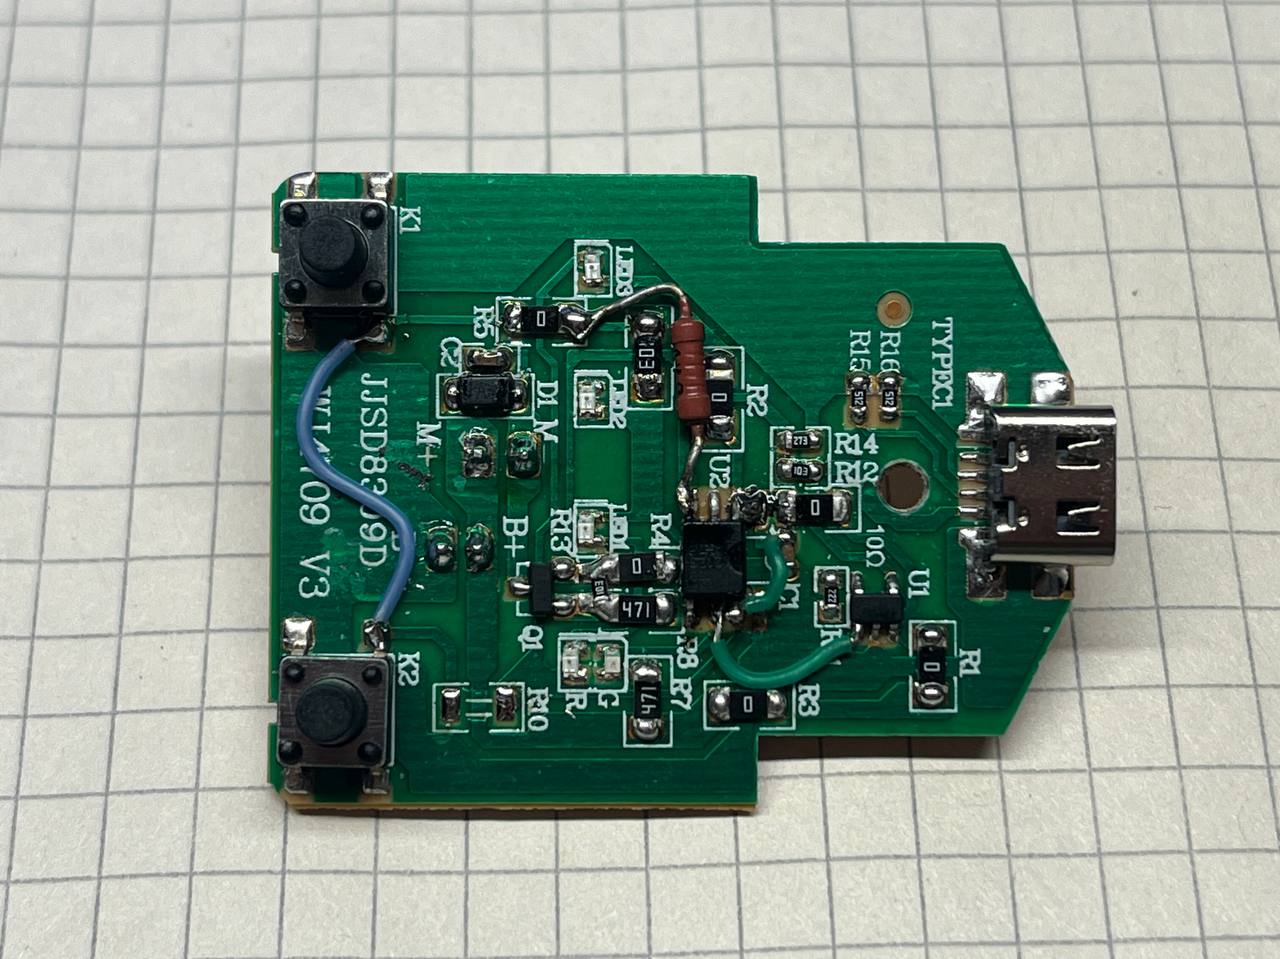
The useless microcontroller was effectively bypassed entirely. Button press now directly controls the motors through the solid-state relay.
The Result
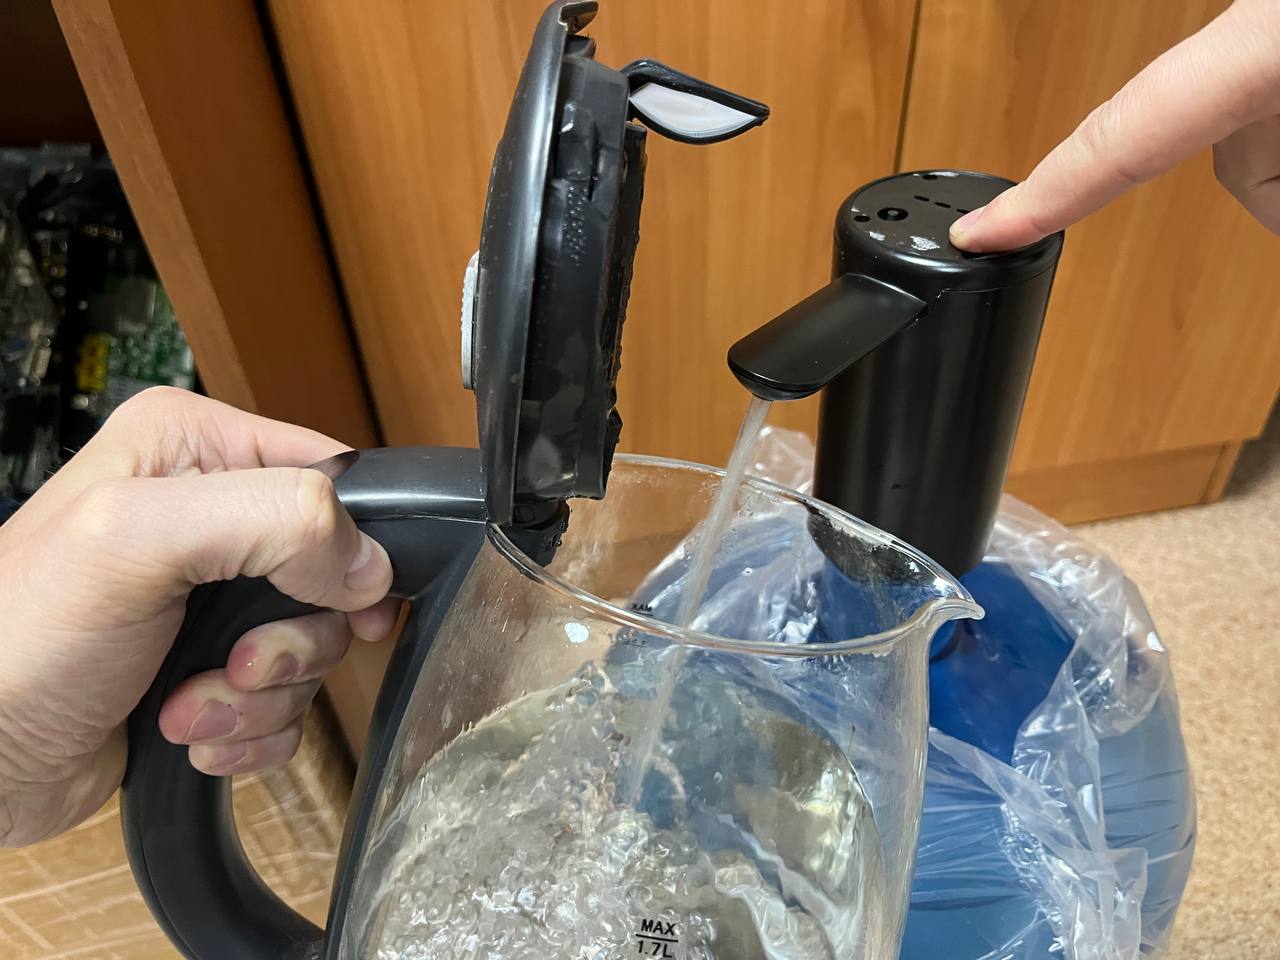
The pump now functions reliably for dispensing water from 19-liter bottles, with proper charge status indication. It's been working for several weeks without any issues.

Takeaway
Don't fall for advertising. This device had a 4.9-star rating on the marketplace. 4.9 stars! And yet it had fundamental design flaws and quality issues that were immediately apparent upon disassembly and testing. If something seems too cheap and too highly rated, it probably is. But at least if you have a soldering iron and some basic electronics knowledge, you can sometimes salvage these things.


