Kitchen Computer Desk
A DIY project transforming an ordinary kitchen table into a multifunctional computer desk with a flip-up lid, gas springs, a monitor mount, LED backlighting, and faux leather upholstery — all for about 3,500 rubles.
In the evenings, having a laptop but no comfortable place of my own to work, the logical solution was to use the kitchen table. You don't bother anyone and nobody bothers you.
The idea to transform the kitchen table into a computer desk came after visiting a store where I saw a table with a lifting lid. However, the ready-made option didn't work — it cost around 7,500 rubles and the tabletop material wasn't right.
Starting Conditions
The kitchen table consisted of two tabletop cutoffs joined by bars and set on legs. I planned to finish the project over a weekend, but the work took a month.
Materials (Total Cost ~3,500 Rubles)
- Tabletop connectors — 2 x 50 rub.
- Tabletop 1m — 720 rub.
- Timber beam 2500x95x45 — 180 rub.
- Board 2000x95x20 — 100 rub.
- Piano hinge 120cm — 210 rub.
- Gas spring 100N — 2 x 130 rub.
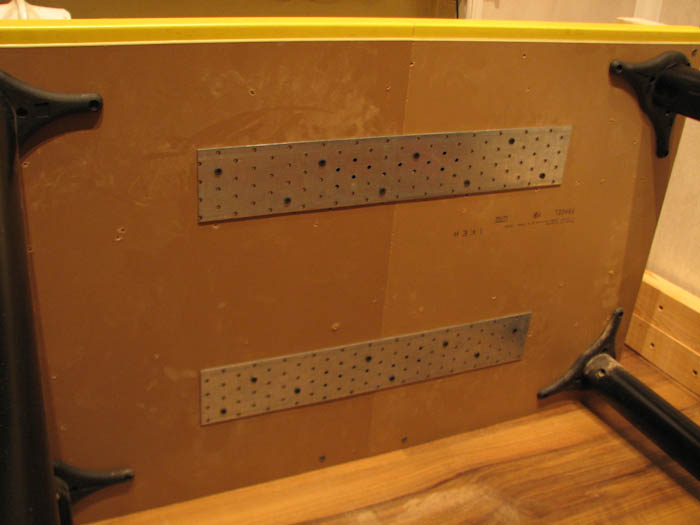
- Metal plate 500x80 — 2 x 85 rub.
- Faux leather 2m — 150 rub.
- LED strip 1m — 250 rub.
- Transformer — 215 rub.
- Switch — 60 rub.
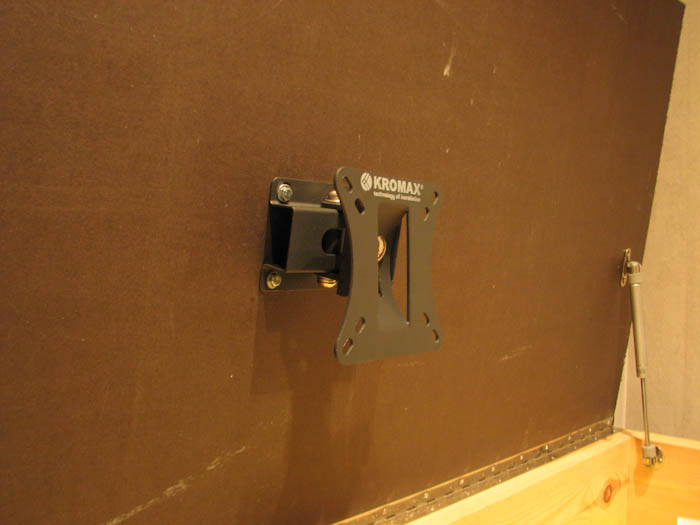
- Monitor mount bracket — 220 rub.
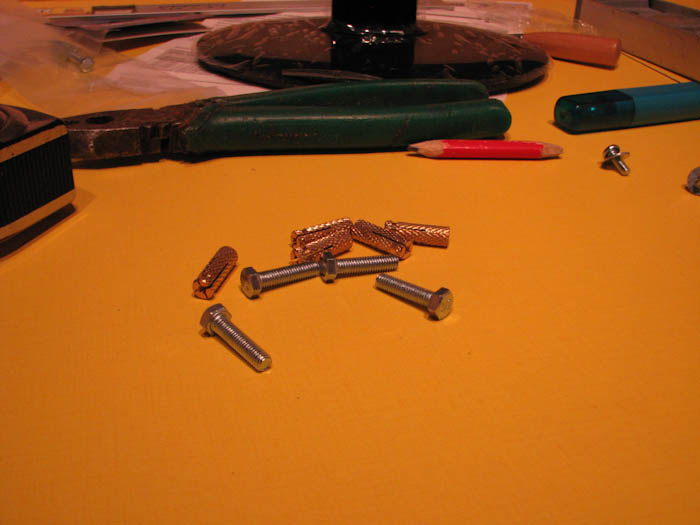
- Dowels 5x16 (1 pack) — 60 rub.
- Bolts 5x20 (6 pcs.) — 30 rub.
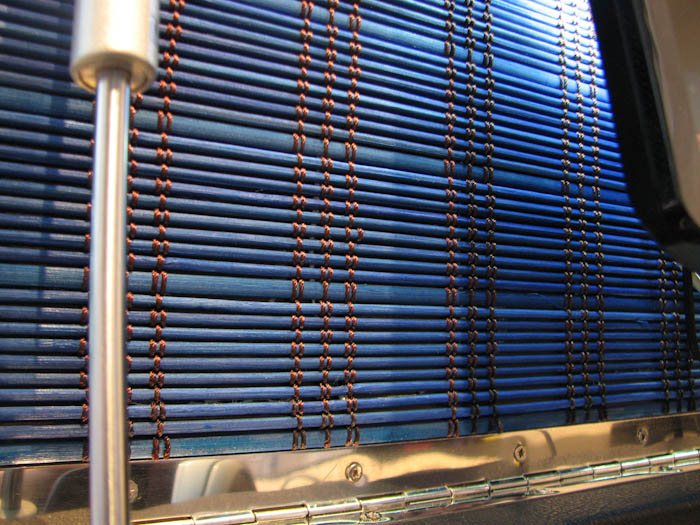
- Bamboo panel (0.6m) — 270 rub.
- Contact adhesive "Moment" — 60 rub.
- Screws
- HDMI cable 1m — 200 rub.
- Angled DVI-HDMI adapter — 600 rub.
Tools
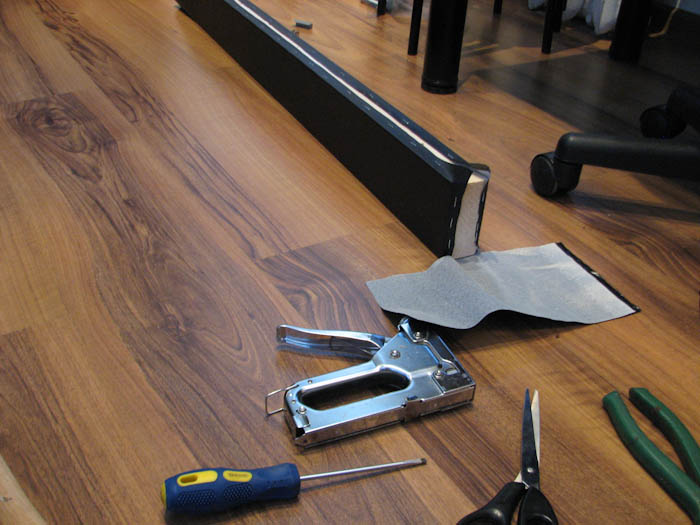
Drill/driver, electric jigsaw, furniture stapler, pliers, screwdrivers, utility knife, scissors, awl, wood drill bits, angle grinder, hammer, tape measure, pencil, sandpaper, iron.
Build Process
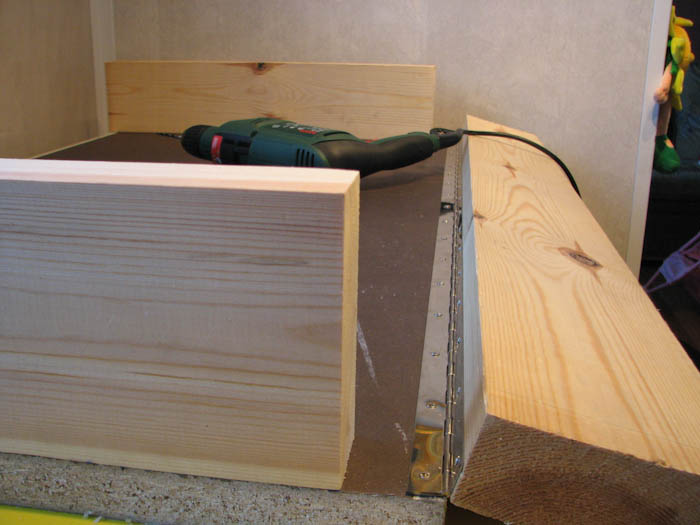
Step 1: Preliminary Cutting
I bought a timber beam measuring 3000x120x45. The 12 cm height turned out to be a mistake, which became apparent later.
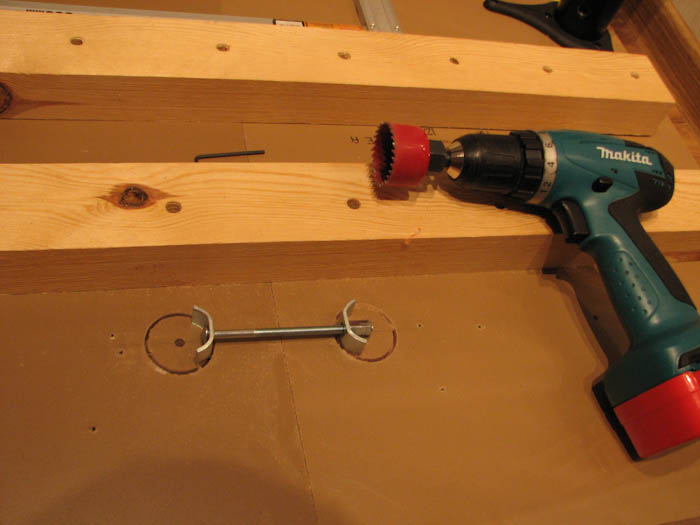
Step 2: Marking Holes
Pre-marking to make attaching the piano hinge easier.
Step 3: Attaching the Piano Hinge
Installing the hinge for the flip-up mechanism.
Step 4: Preliminary Assembly
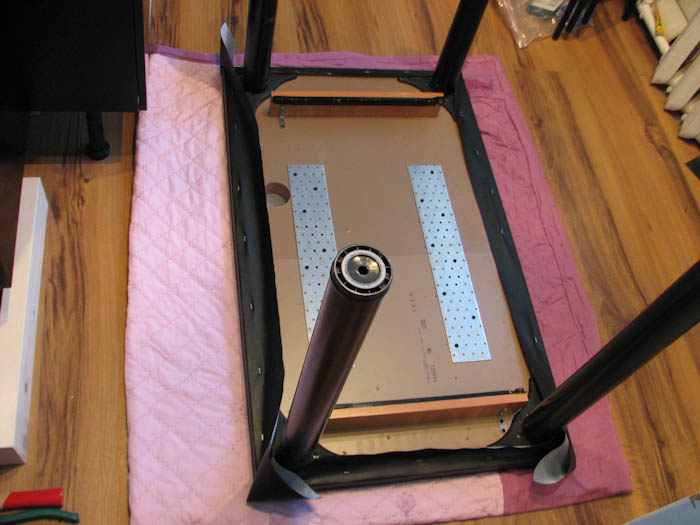
Bars are screwed to the underside of the tabletop with 100mm screws.
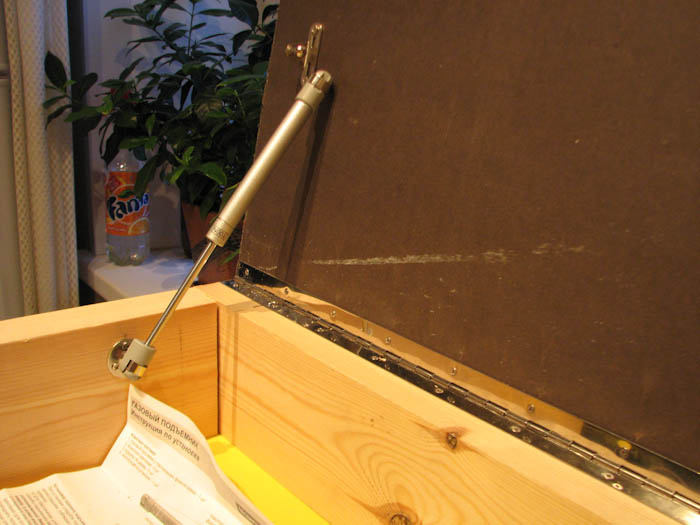
Step 5: Attaching the Gas Springs
"I had to tinker with them quite a bit to find the right angle" for the lid to close without the piston rod getting in the way.
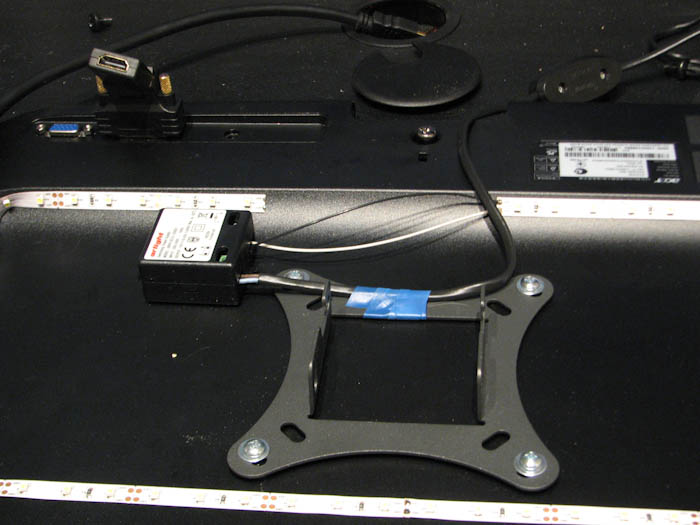
Steps 6-7: Mounting the Monitor Bracket
Special dowels and bolts were used for secure attachment.
Step 8: Mounting the Monitor
Installing the screen onto the bracket.
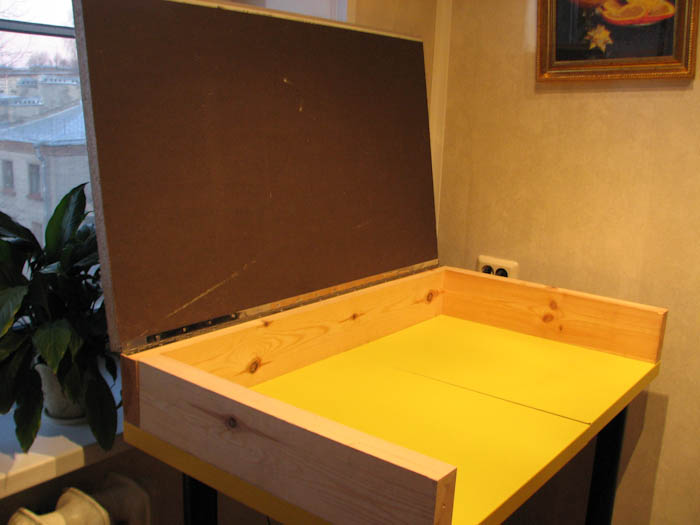
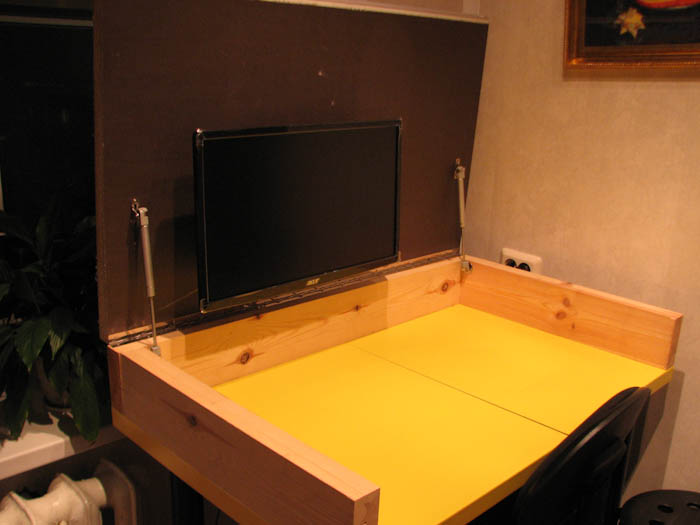
Step 9: Intermediate Result
At this stage, it became apparent that the table surface had risen by 14 cm, making it uncomfortable to sit at.
Fixing the Height Problem
To save space, three measures were taken:
- Replaced the 3000x120x45 beam with a 2500x95x45 one (minus 2.5 cm)
- Replaced the bracket with a 68 mm offset for one with a 32 mm offset
- Removed the supporting bars (minus 4.5 cm)
In total: the table legs were cut by 8 cm.
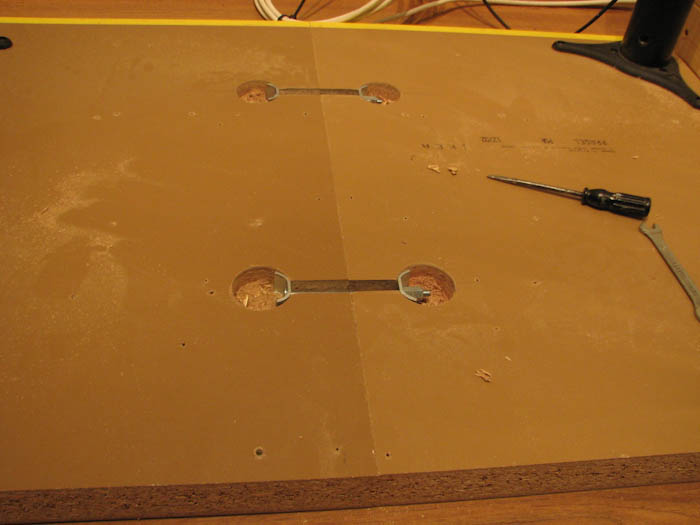
Step 10: Joining and Reinforcing the Tabletops
The two halves of the tabletop were firmly connected using tabletop connectors.
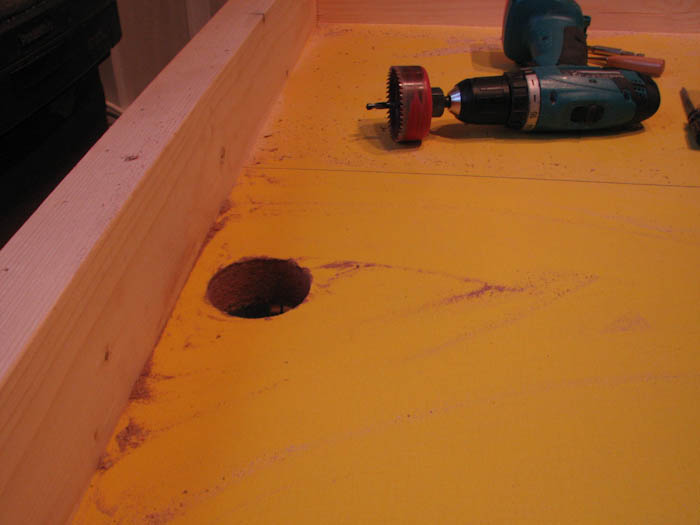
Step 11: Cable Grommet Hole
Creating a hole for cable pass-through.
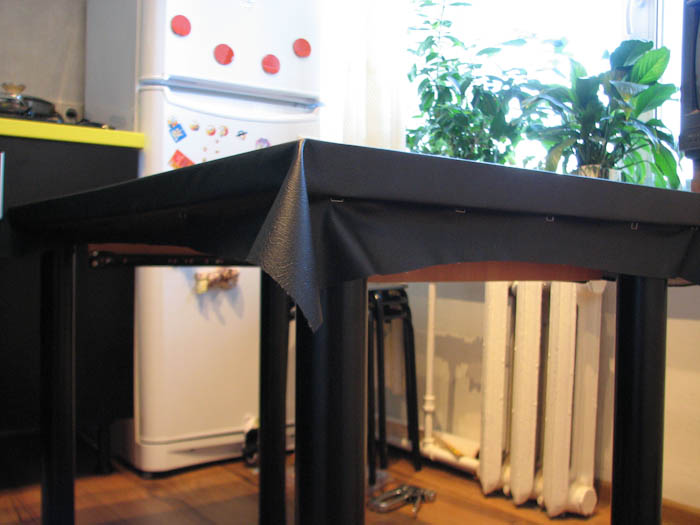
Step 12: Faux Leather Upholstery
The surface was covered with faux leather for a clean look. I originally planned a pull-out shelf for the laptop, but it was removed because it interfered with my knees.
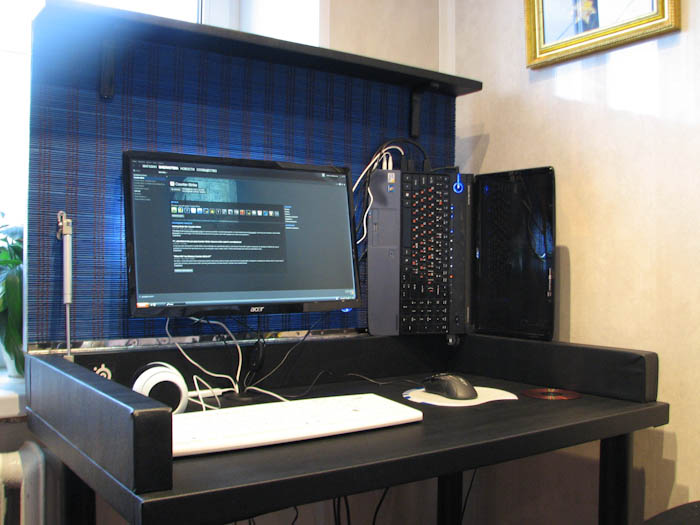
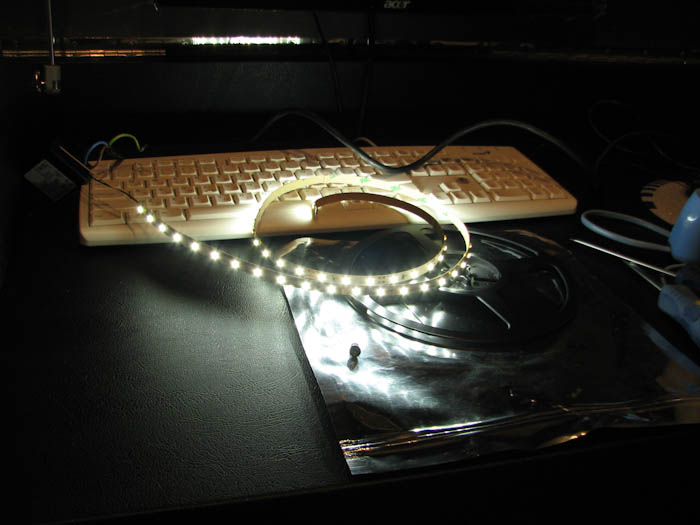
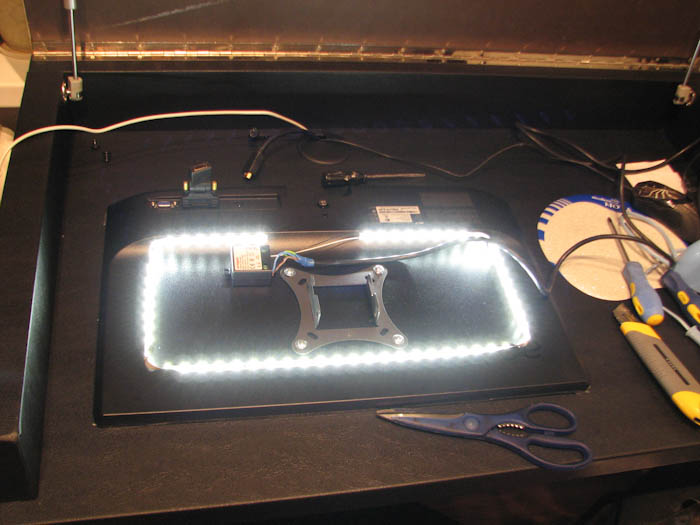
Step 13: Monitor Backlighting
LED strip, transformer, and wiring were installed behind the monitor for ambient lighting.
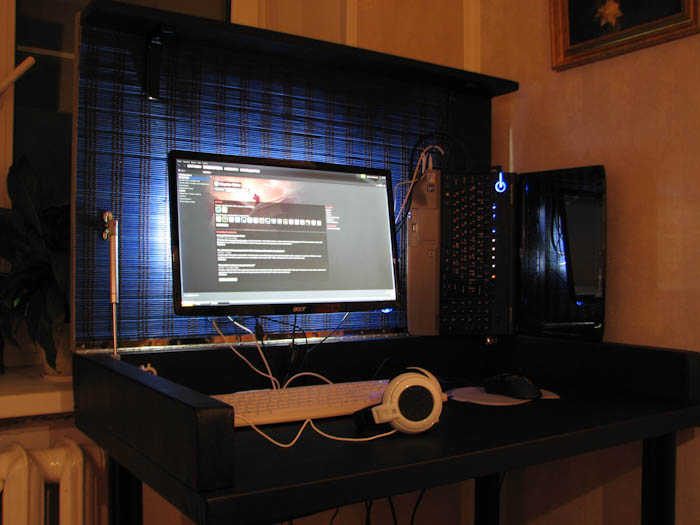
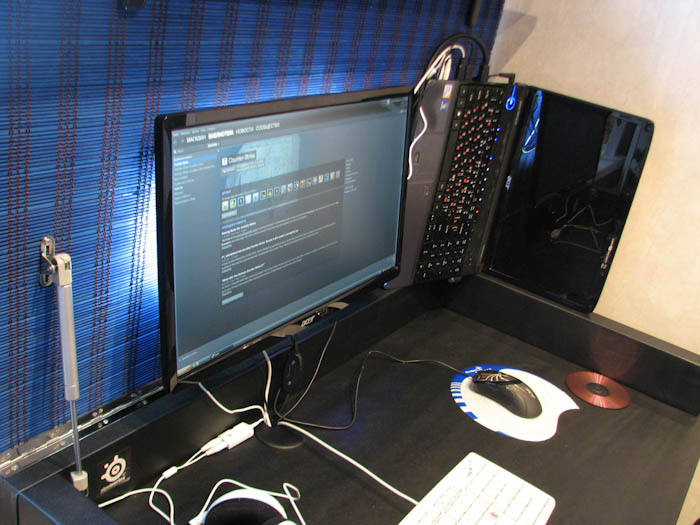
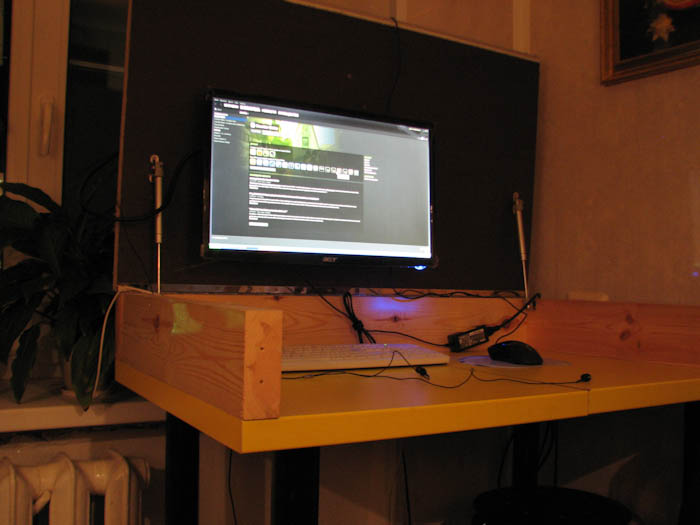
Step 14: Final Result
The finished table with evening lighting.

Final Notes
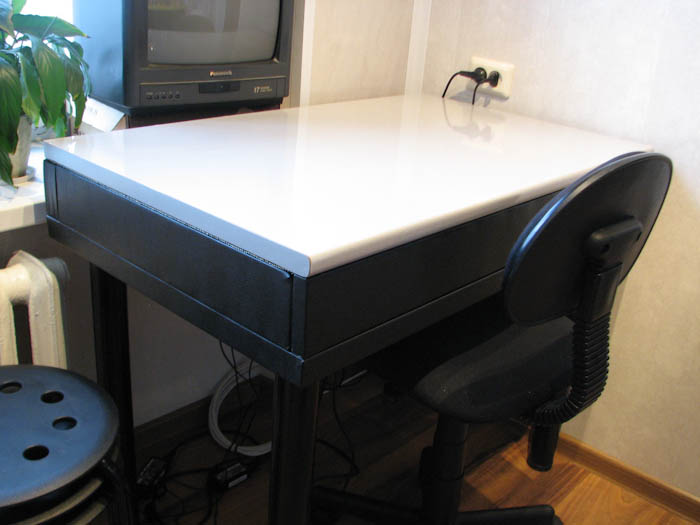
All 220V cables plug into a power strip screwed to the underside of the table. The bamboo panel is glued on with universal "Moment" adhesive. When closed, the table looks like a regular kitchen table. After work, the laptop folds up and is put away.
Measurements: 65 cm from the floor to the underside of the tabletop, 81 cm to the highest point. At the author's height of 183 cm, there's enough room to sit comfortably, even with legs crossed.
Update: I later got rid of the laptop and placed a desktop system unit on a shelf under the windowsill, keeping the ability to quickly open the lid and start working.