Why You Can't Charge a Smartphone from a 9V Battery
A hands-on experiment disproving the claim that you can charge a smartphone from a 9V battery through a 7805 linear voltage regulator, with current and voltage measurements explaining why it fails.
Attempting to charge a phone from a 9V battery through a KREN5A voltage regulator
Not long ago, a post titled "When the Battery Dies" appeared on Habr, remarkable for its stunning incompetence. That would have been fine on its own, but the post even made it to the front page, meaning many people read it, and the author criminally misled them. To demonstrate why the post was wrong, the experiment was repeated with maximum thoroughness: measuring currents and voltages. This article also explains why this approach is impossible, and what to do if you really want to charge your phone from batteries.
Welcome under the cut.
What's the Problem?
Let's immediately identify the claims that ne_kotin made in the post that are incorrect.
The author says:
I want something powerful (1.5–2 amps) and cheap — preferably under 100 rubles. Something you can solder together on the fly.
And I've got just the thing!
This phrase is the main thing that misleads people and reveals the author's complete incompetence. The KREN5A chip itself can handle currents of 1.5–2 A, but the question — whether a 9V battery can deliver those currents — the author left entirely out of the picture.
Next, the author provides a circuit that can safely be simplified by removing the unnecessary capacitors (the battery itself is already a capacitance). After this, the author confidently claims that this device successfully charges phones. He speaks confidently about absurd things, and attempts to convince him to take down the post were unsuccessful.
A real flame war erupted in the comments — serious electronics engineers were laughing at this contraption. Even in a well-known LiveJournal community dedicated to radio electronics, a wave of outrage over this post broke out.
So, our goal: to test the existence theorem of whether it's possible to charge a smartphone from a 9V battery through a KREN5A (or KREN5B) voltage regulator chip, and what current this battery will deliver during charging.
Components and Assembly
To test this, we don't need much: a perfboard, a USB connector, the chip itself, a charging cable, a smartphone, a 9V battery clip, a multimeter capable of measuring current — and optionally, steady hands and a soldering iron :).
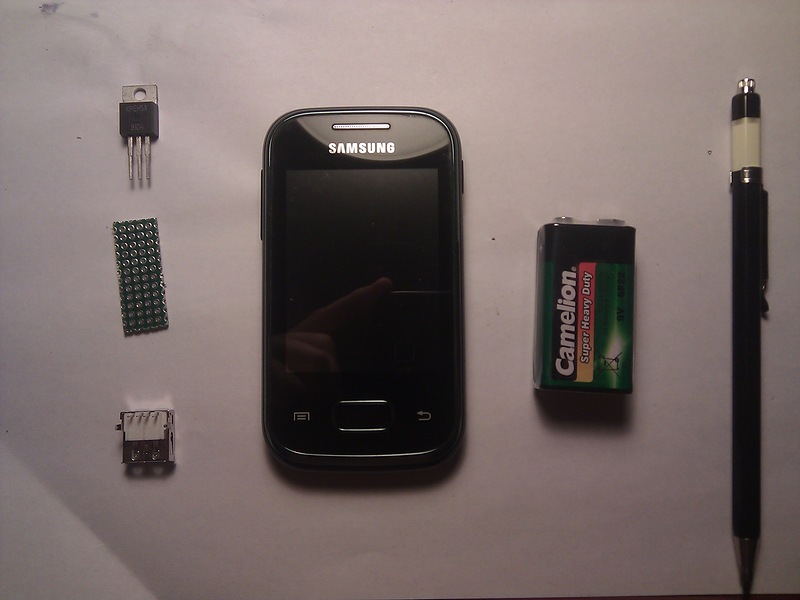
Some of the components
The smartphone chosen for charging wasn't the one in the photo, but an HTC HD2 running Android. As it turned out during the experiments, the phone shown above was badly glitching after a failed firmware flash and wouldn't allow installing third-party software. Charge/discharge monitoring was done using the Battery Mix app.
A new 9V battery was purchased for the experiments from the nearest newspaper kiosk by the metro exit.
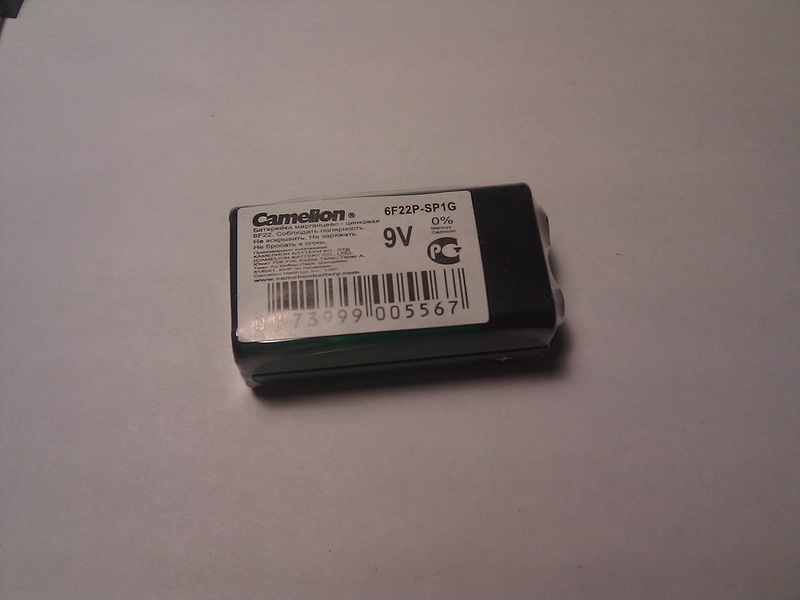
Sealed battery
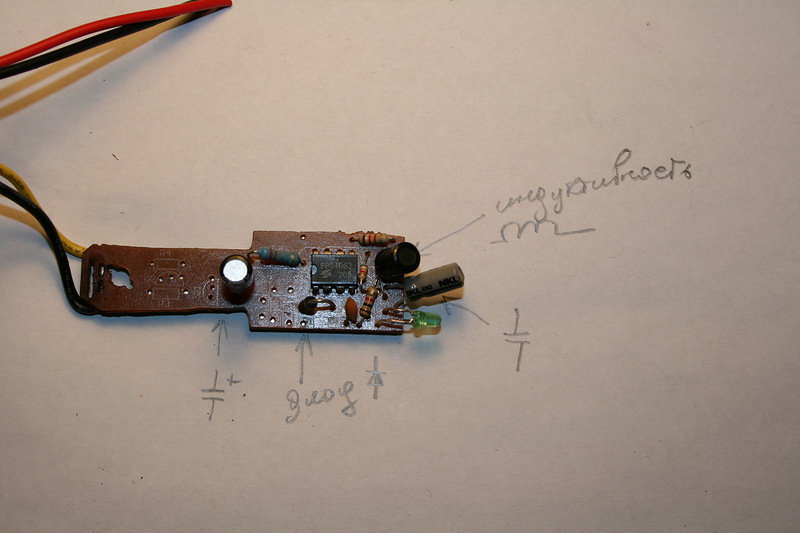
We assemble according to the circuit from the criticized post, just without the capacitors.
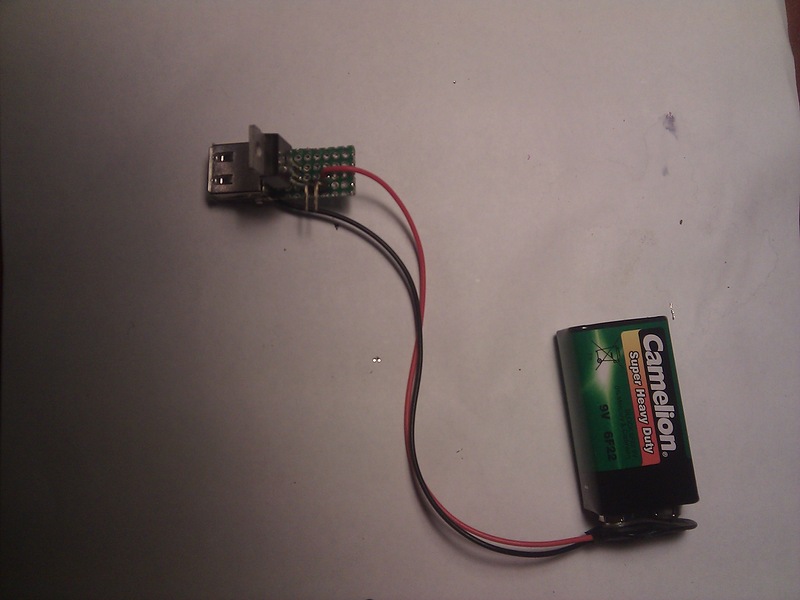
Device assembled
Let's verify that we have the required voltage at the output.
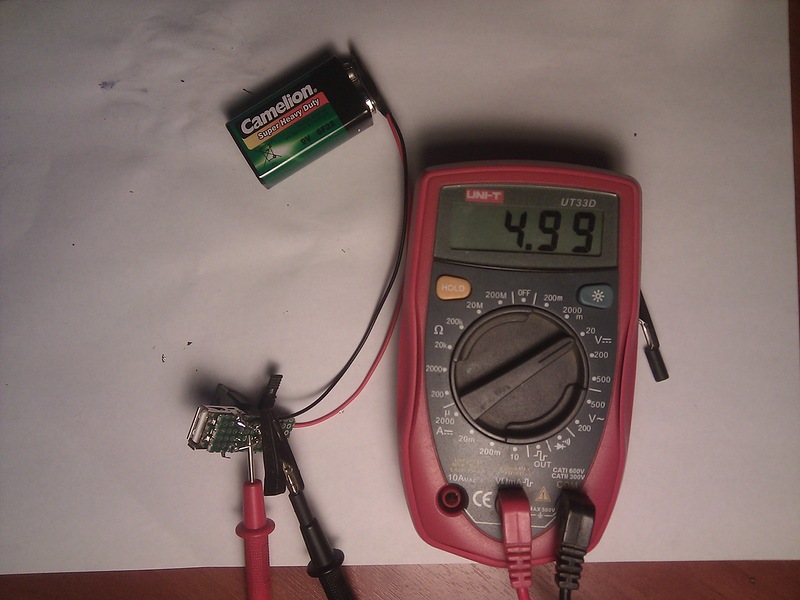
Five volts, right on the money
All that's left is to drain the phone. To do this, all wireless radios were switched to active mode, and a 10-hour YouTube video was launched. The device drained in about 40 minutes. 4% charge was left so that the device could still be interacted with and its state monitored.
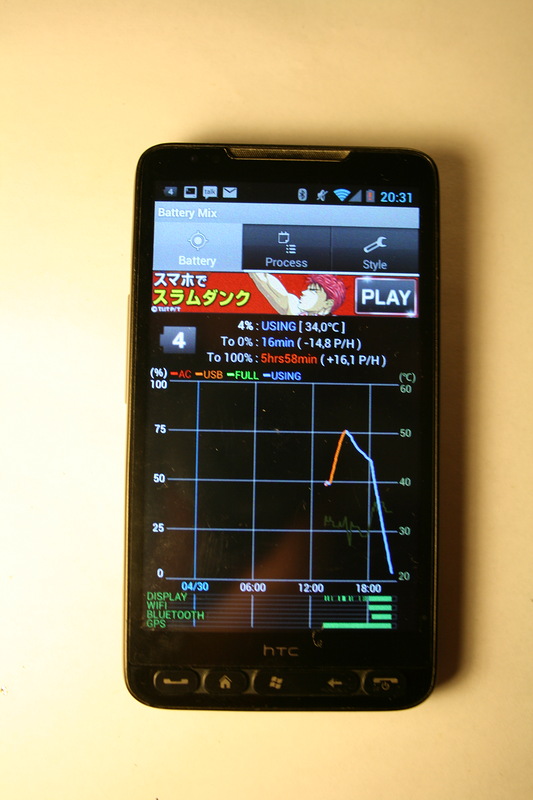
Smartphone drained to four percent.
You can see the sharp drop in the phone's battery charge graph. So now we have everything ready to begin the experiments.
Starting the Experiments
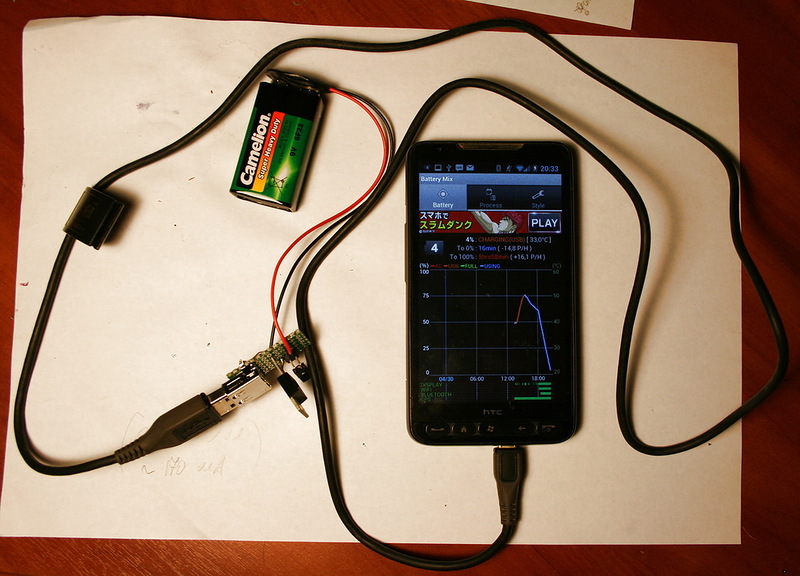
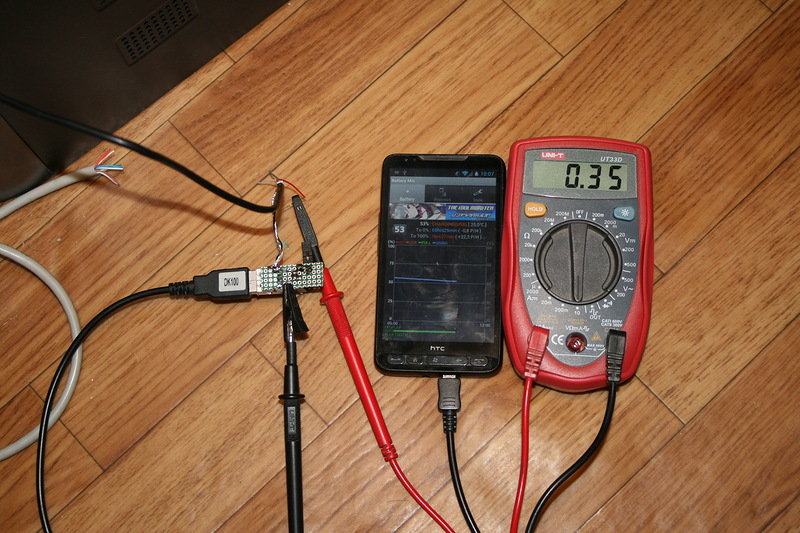
We connect the phone to our charger. The photo at the beginning of the article shows this. The phone happily reports that it sees voltage and the charging process has begun.
However, it's not just interesting to see that charging icon — which apparently is what misled ne_kotin — but to actually measure the current. We measure the consumed current immediately and after half an hour from the start of charging:
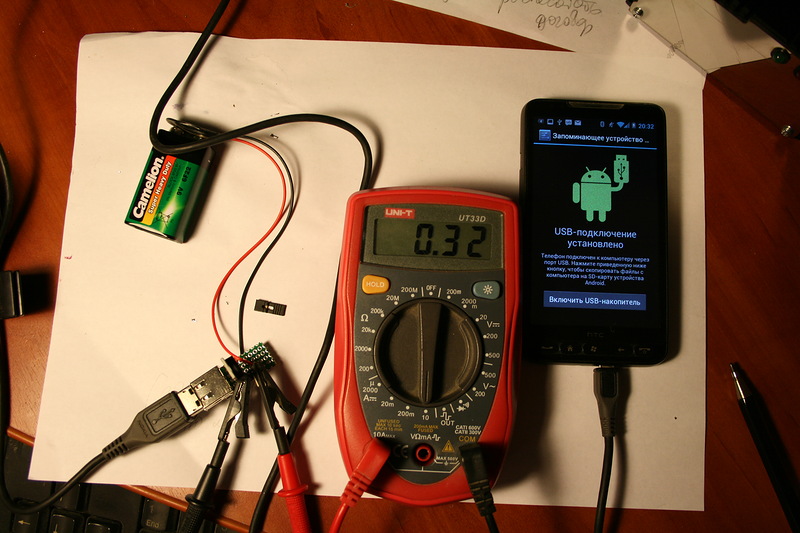
Start of charging. Charging current is 300 mA
At the beginning of charging, a quite decent 300 mA charging current. But the claimed 1.5–2 A are nowhere close! The results after half an hour are significantly more interesting:
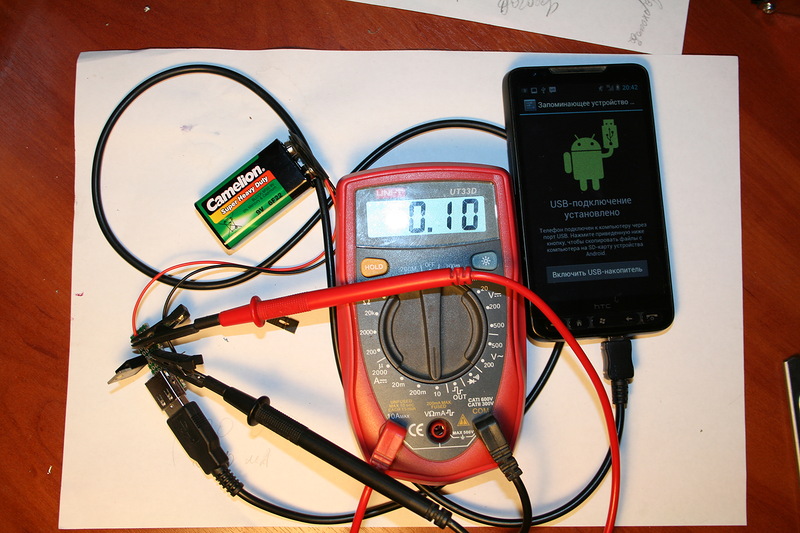
After half an hour: charging current dropped to 100 mA!
The irony is that despite putting the phone in airplane mode, turning everything off, not touching the display, and trying to minimize power consumption by killing all apps, it stubbornly continued to discharge.
After an hour, 1% of the phone's charge remained. It was decided to measure the charging voltage and the battery voltage. The results were very interesting.
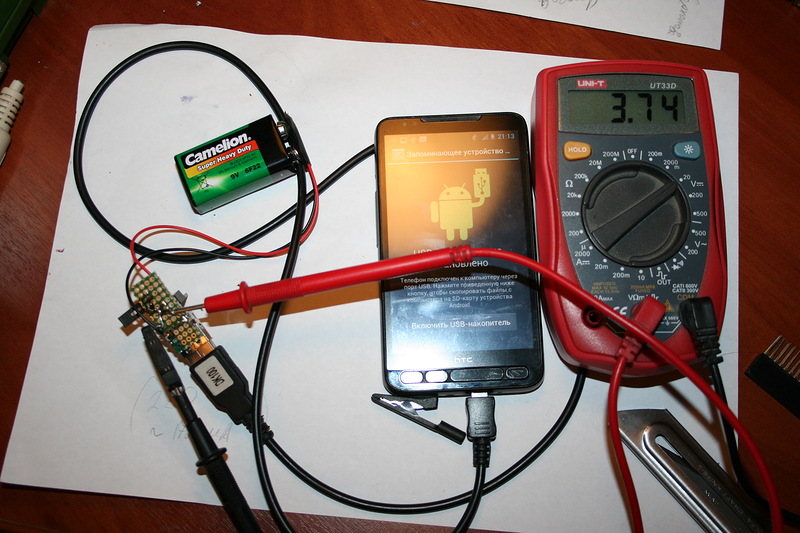
Voltage going to the phone: 3.7V — clearly insufficient for charging
Interesting — how much is on the battery?
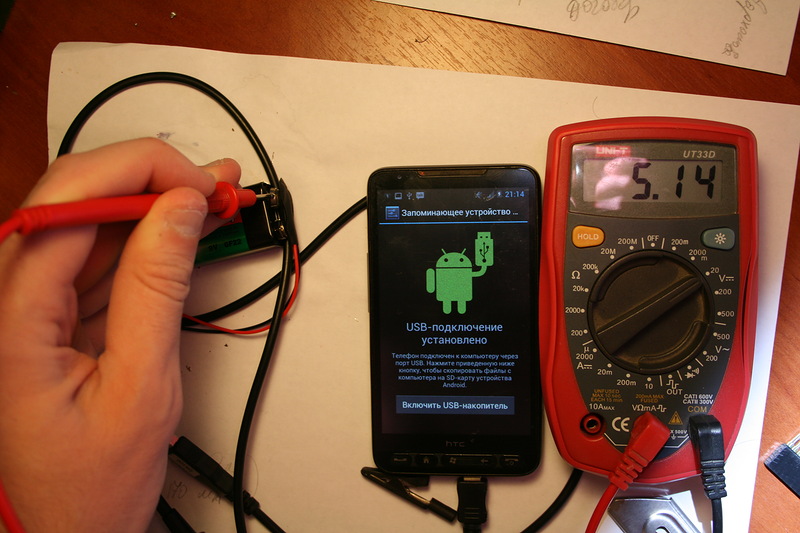
Battery voltage is only 5V!!!!
After this, the decision was made to stop the experiment due to its futility and put the smartphone on a proper charger.
Results of Our So-Called Charging
You've probably already guessed that I failed to charge the phone this way. The graph tells us much more about it.
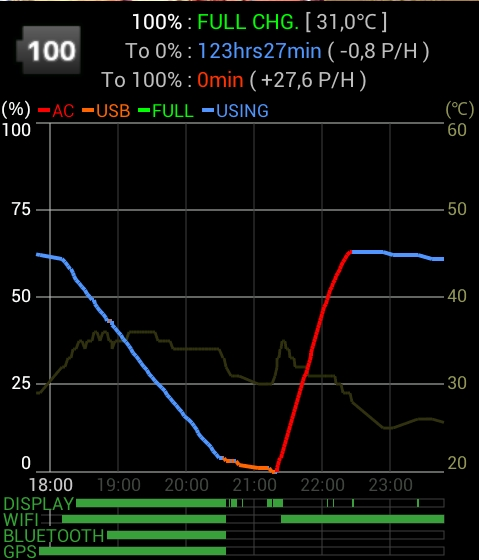
Graph of discharge, "charging" from battery, and from wall charger
The orange line is the charging from the 9V battery. As you can see, at the very beginning there were even some feeble attempts to charge. But then this circuit merely slowed the inevitable death of the phone from discharge.
Results: using this circuit to charge a phone from a 9V battery is not feasible!
Why Did This Happen?
Let's do a post-mortem analysis of why this happened. First, let's compare the specs of our 9V battery and the phone's battery. A bit of googling led me to the manufacturer's website, where I got its specifications:
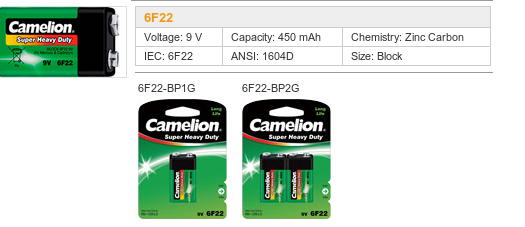
Battery capacity: 450 mAh, voltage: 9V.
Let's look at the phone battery's specs:
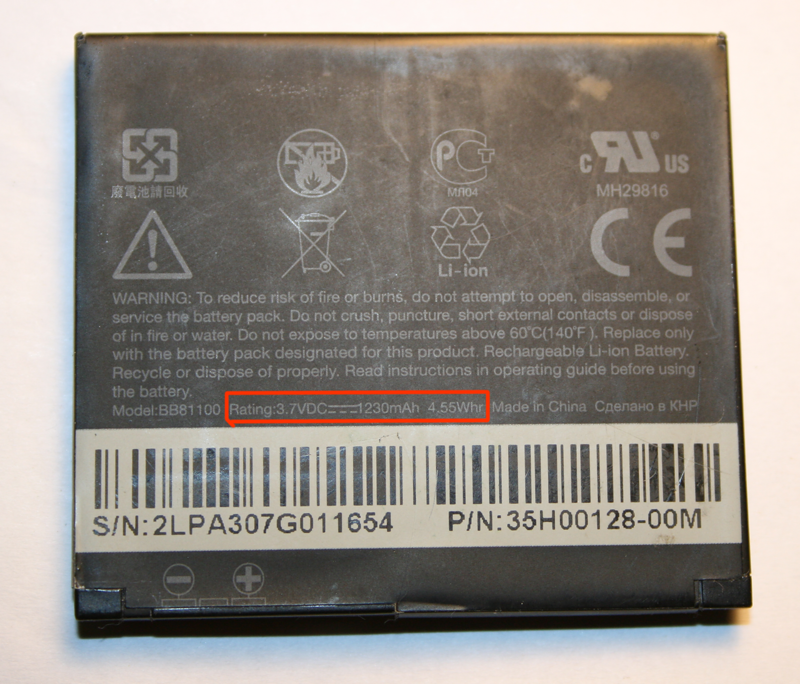
Voltage: 3.7V, capacity: 1230 mAh, and the most important parameter — battery energy: 4.55 Wh
Pay attention to the parameter called battery energy. The probable energy (if the manufacturer isn't lying) of our 9V battery is:
Wh = U × I × h = 9 × 0.45 = 4.05 Wh
In plain language: even if we could extract the battery's energy with zero losses, we could never fully charge the phone with it! And keep in mind that extracting all the energy from a battery is impossible — some will always remain.
Now we also need to account for the efficiency of our power converter and the charging circuit. Let's assume the charging circuit's efficiency is 80%, hoping the manufacturers made it as high-quality as possible. The efficiency of our converter is calculated simply: the ratio of output power to input power.
η = (V_out × I_out) / (V_in × I_in)
Since the input and output currents are practically equal (the chip's own consumption is negligible), the ratio turns out to be quite simple:
η = 5/9 = 0.56
The total efficiency is η = 80% × 0.56 = 44.8% — roughly the same as a good steam locomotive. As a result, in the best case, less than half the battery's capacity can reach the phone's battery.
But that's not all. As we recall, a current measurement was performed above showing what the smartphone was drawing from the battery. At best, it was 300 mA. For experimental purity, we should also measure the charging current from USB and from a wall charger. After slightly modifying the board to bypass the 9V battery, these measurements were taken.
Current from USB port
Note right away that the consumed current is stable. And according to the standard, a USB port can deliver up to half an amp!
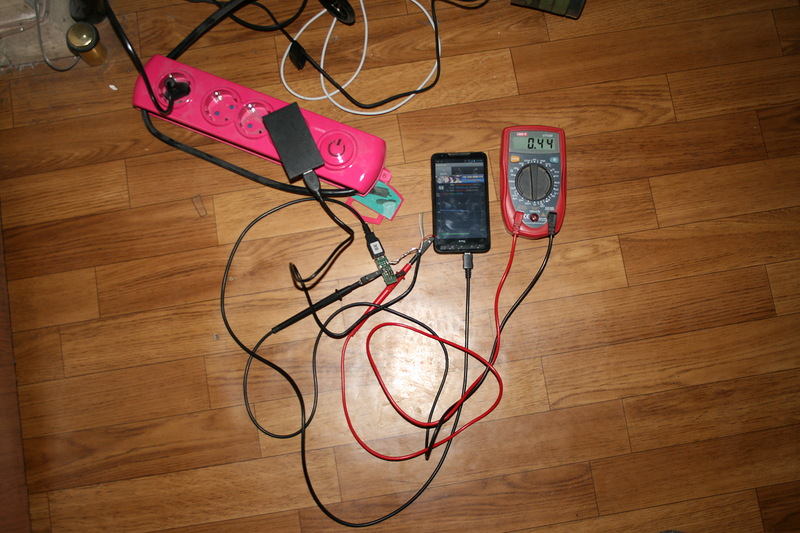
Current consumed from wall charger
This last photo speaks volumes — the phone draws up to half an amp during charging! Meanwhile our battery quickly gave up and was delivering only 100 mA, which was clearly insufficient for charging.
What Are the Solutions?
We've figured out what went wrong, so what can be done? You still want to charge on the go!
Well, first of all — use higher-capacity power sources. This same circuit with the linear regulator would work perfectly fine when powered from a car battery. The author of this article, during his university years, built himself a "portable" CD player from a CD-ROM drive, a cash register battery, and one of these regulators. You could listen to music for two hours.
Another, more proper approach is to use a switching (buck) power supply. This is a cheaper and more correct solution. Even the cheapest Chinese car cigarette-lighter chargers contain a switching power supply inside. For example:
PCB of a car charger for Siemens phones
After some brief googling, we find the datasheet for the chip, and it contains practically the schematic of this charger:
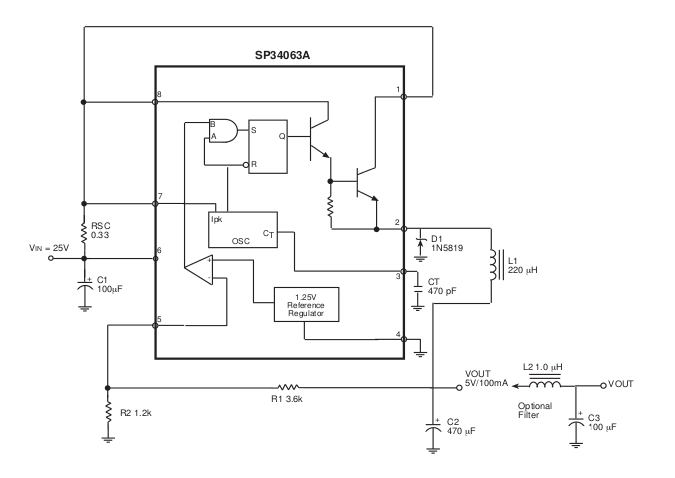
Charger Schematic
The topic of switching power converters is vast and inexhaustible, so we won't go into detail here. I'll just say that cheap Chinese converters exist that you can buy on well-known auction sites and solve the battery charging problem.
Readers of this post can drop links in the comments themselves.
Conclusions
It's sad when incompetent articles appear on Habr and the majority perceives them as useful and interesting. Though, thankfully, such cases are rare. The irony is that when someone here talked about how they "suddenly" discovered variable overflow in C and how they solved it, the post was downvoted to oblivion (to minus 100). But this post was considered perfectly fine, even though it describes a significantly greater and more impractical absurdity.
In short, the author ne_kotin misled people by proposing the use of long-obsolete linear regulators, and especially by proposing them for smartphone charging.
However
Of course, the KREN*** chips (there are many), their foreign equivalents 78**, and all other linear voltage regulators are an excellent solution for low-current circuits. I actively use analogs of these chips in my own projects (with significantly better specs, of course). Every student should try using them in their projects — but there's absolutely no need to write about student-level projects on Habr, especially for adults.
P.S. I'd be extremely grateful for any criticism of this post, and please send typo reports via private message.


